I’ve explained this to a few people quite a few times in emails. I really want a URL to point people to so I can just point them there so here’s a blog post showing it.
TL;DR
The scenario is that you want to contribute to a public project in a git repository (repo). The most common way, and best way, to do this is to fork the repo so you have your own copy. You then make your changes in your copy (commonly called the forked repo) which is completely independent of the original repo (commonly called upstream). Once you have done your changes you submit them to the original repo in a pull request which essentially requests that the owner of the original repo pull your changes by pulling your code commits from your forked repo into their original repo.
Sounds simple, except there’s a key scenario that you need to consider: what happens when the upstream repo has changes that occur between the time when you first forked it and when you submitted the pull request? Maybe those code changes conflict with the changes you made. You are reposible for making sure the code you submit to the original repo work; you don’t send things that break to the owner because they won’t accept it.
What you need to do is keep your forked repo in sync with the original repo. This goes by many names & phrases such as keep your fork in sync with upstream. In this post I’ll explain & demonstrate how to keep it in sync.
GitHub has two articles that demonstrate the CLI commands you can issue to Git to do all this stuff I’ll explain here:
I use their terms because they are the generally accepted terms, but the screenshots I use will come from the source control tool I use and prefer: SmartGit. I’m also using the repo for the Office UI Fabric in my example.
Starting Out - Forking & Cloning a Repo
I’m going to assume you’ve already created a fork of the original repo. You do this by going to any repo on GitHub and click the fork badge in the top-right corner. This will create a copy of the original repo in your GitHub account that looks like this:

Sync'ing Git Forks
Notice how just below your repo it indicates where the original repo is. In this screenshot we call your copy (indicated as andrewconnell / Office-UI-Fabric) the fork and the original (indicated as OfficeDev/Office-UI-Fabric) the upstream.
To do any work with this, you need to clone your fork to your local machine where you do work just like any other repo. We refer to this copy of the repo on your machine the local repo.
Set up an Remote To the Upstream Repo
Once you have cloned your fork to your local machine, you will have a single remote repo called origin. This points to the fork repo you have in your GitHub account. This is set up by default when you clone a repo.
So, to review, on your local computer you have a local repo which is where you will do all your work. It has a remote named origin that points to your fork of the original upstream repo. Both the fork and upstream repos live in GitHub, not on your local machine.
But what if things change in the upstream repo after you create the fork? You need to get those changes into your fork. Since you don’t ever really do any active development in GitHub, rather you do work on your machine & push the changes back to GitHub, you need to get those changes from upstream into your local repo.
To do this, you need to crete a second remote on your local machine. We call this upstream. There are so many different UX for this based on the tool you are using or if you are using the command line. What you want to do is get the URL for the original (aka: upstream) repo - in this case it’s the URL for the Office UI Fabric repo. Now create a new remote named upstream with the URL of the original’s Git repo.
Let’s see where we are. If you run the command git branch -a from the command line, you will see a list of all the branches you have, including those for the remotes:
Sync'ing Git Forks
If you run git remote -v you will see a list of the remotes and the corresponding URLs they point to.
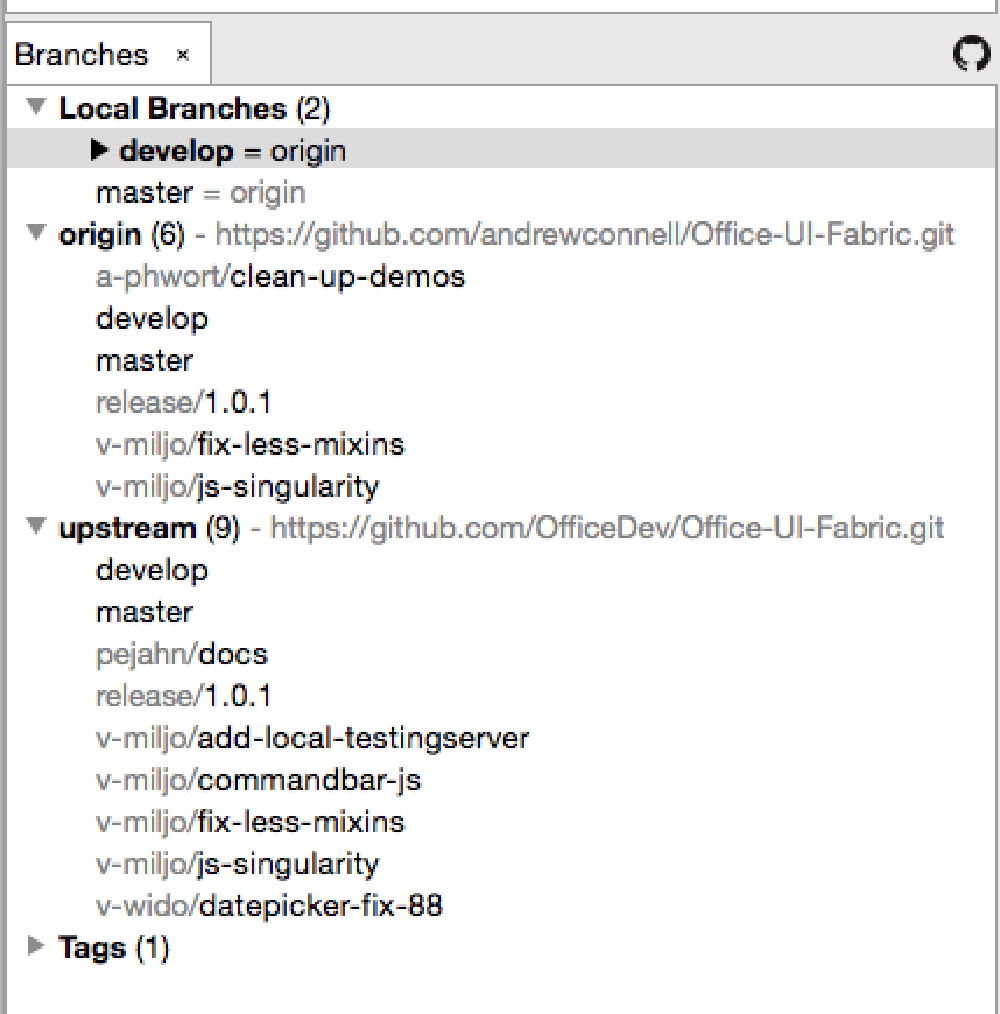
In SmartGit here’s what I see… it has nice organization of everything.

Sync'ing Git Forks
At this point we’re all set up, both in GitHub & on our local machine, to to contribute to the public project.
Syncing Your Fork
Since you originally created the fork, the upstream repo has had a bunch of changes done to it. Before you can submit your changes to the upstream repo, you should get the latest version of the upstream repo to ensure your changes don’t break anything when you submit the pull request (PR) to the upstream repo. If they do, you can be assured there’s a good chance your PR will be rejected - the idea was for you to help with the project and contribute, not make things worse!
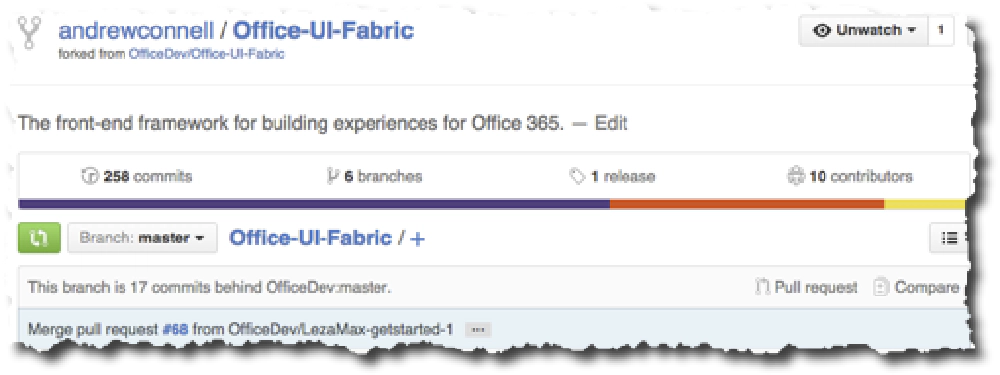
How do you know if you are out of sync? Easy… go to your fork on GitHub… if it says you are behind the upstream repo, then you’re out of sync. You can see this from my fork below. It shows that there have been 17 commits since I last forked (or sync’d) from upstream:

Sync'ing Git Forks
Before we move on, let’s think real world here… we need a scenario to work from…
Let’s say you created a local branch off of your local master branch called issue-123 where you will do your work on issue #123 in the upstream repo’s issue list. What you want is to get that branch updated with the latest code from upstream, but branch issue-123 does not exist in any of the remotes upstream or origin. What does exist is master… that’s what you created your issue-123 branch from. So what you want to do is the following:
- Download the changes from upstream/master
- Merge the changes from upstream/master into your local/master
- Merge the changes from your local/master into your local/issue-123 branch
- Optionally push the changes from the merge in local/master to origin/master to get rid of that this branch is 17 commits behind OfficeDev:master message in the screenshot above
OK… now that we have our scenario, let’s move on…
You want your fork to be identical to the upstream repo + include your changes. So how do I fix this? GitHub has a good article that explains this, GitHub: Syncing a Fork, but while command line stuff is powerful, it is hard to visualize.
What I do in SmartGit is right-click the upstream remote in my list of branches and select Pull to get all the changes from the upstream down to my local machine.
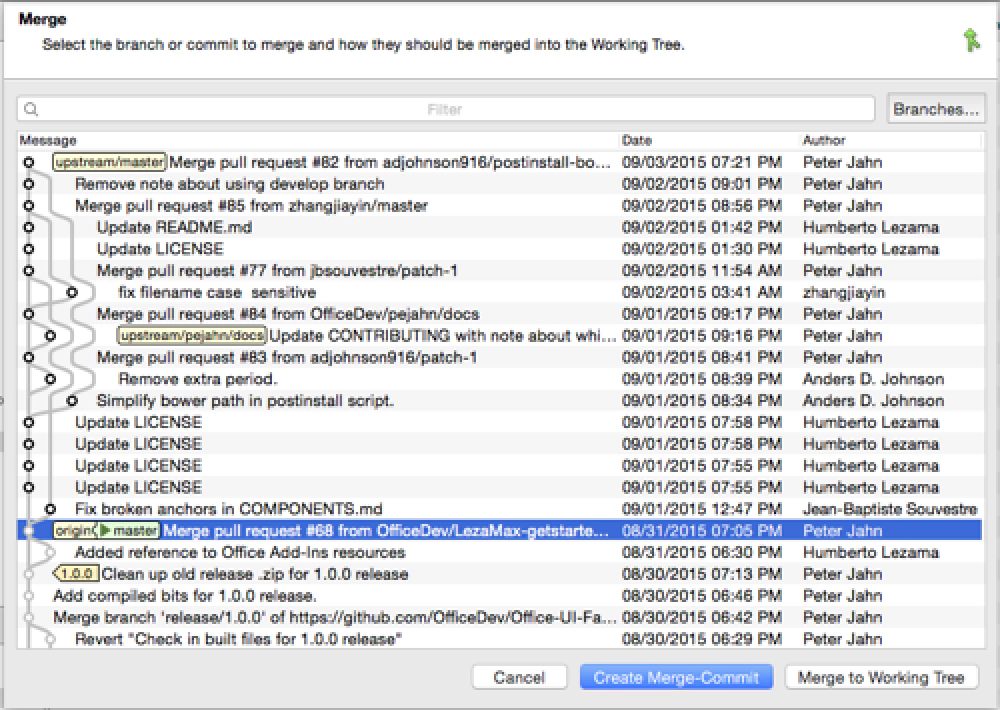
Now, I want to merge the changes from the upstream branch to my local branch. When I bring up the merge tool in SmartGit, I first make sure I have all the branches I’m interested in selected. In this case, I’m interested in the following branches at minimum:
- local/master
- origin/master
- remote/master
Here’s what I see:

Sync'ing Git Forks
What is this showing me? The blue highlighted line shows that this is both the origin/master and where my current local/master is (indciated by the green arrow whcih shows where my HEAD is). It also shows that way ahead of me, 17 commits ahead of me, is where I will find upstream/master.
What’s my goal? I want all 17 of those comments in my local/master! In other words, I win the game if that top line shows origin/master and upstream/master next to each other. That means they are both at the same level and caught up. OK… actually I want them in my local/issue-123, but that comes later.
So what I do is select the line with upstream/master on it and click the Create Merge-Commit button and when prompted, I select a Fast-Forward Merge. What that does is it basically says apply all those changes to my local branch… or better yet, just fast forward me to where they are upstream.
At this time I’d verify that my code still works locally… if it doesn’t it’s because I likely changed something that I’d need to address.
I’d then repeat the same merge process but I’d merge from local/master into local/issue-123.
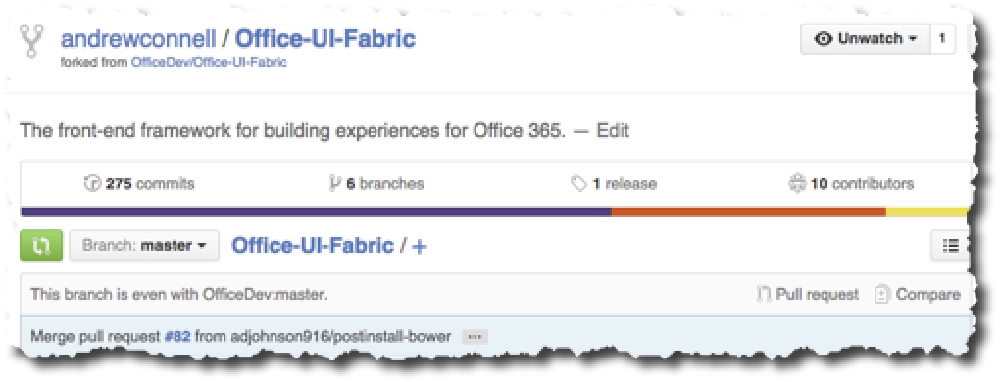
And finally, I’d push all my changes in my local branches up to my origin so I get a nice little message saying that I’m even with upstream!

Sync'ing Git Forks
Parting Thoughts
I find it to be a good practice to frequently sync my fork with changes from upstream. You never want to get one of your branches too far off what is going on with the upstream repo. If so, that means you are making a massive change and frankly you will have a hard time merging something like that into the upstream repo or getting the owners of that project to even consider your PR.
How often should you sync? Well it depends on how much activity is going on upstream. I usually do it maybe every day or every other day… it’s sort of like washing your hands. It’s hard to argue against doing it too much, but easy to argue against not doing it enough.
Oh yeah… and after one of your PR’s gets accepted, remember… that’s a change to upstream. Just because you made it, you need to make sure it gets added to your local copy so the workflow should be something like this:
- Submit PR to upstream
- Someone approves the PR and merges it into the upstream repo
- You should sync your repo from upstream after the acceptance of your PR merge