This page serves as the portal for all information related to the SharePoint Project Utility Visual Studio tool window I’ve created for developers using Visual Studio 2005 / 2008 with DevExpress’ DXCore.
Overview
Background
Like many other SharePoint developers I’ve adopted a similar approach to building SharePoint projects and solution (*.wsp) files. My process is not unlike many others where I mimic the SharePoint “12” folder structure in my Visual Studio projects (only the folders that I’m using). What got really annoying to me was the repetition of adding the same folders whenever I created a new project. I don’t like using custom Visual Studio project templates because then anyone using my project will need to have my template installed. This was meaningless work that a machine could do for me.
In addition, when creating Window SharePoint Services (WSS) 3.0 solutions (*.wsp), SharePoint developers are forced to create a *.ddf file and manifest.xml file that makecab.exe and SharePoint will use in the packaging and deployment of the solution files. Some create these manually and others use home grown tools. None of the tools really caught on to me. I hated building these files as they were almost always following the same process. This was more meaningless work that a machine could do for me.
So I set out work on this project…
Introducing the Visual Studio SharePoint Project Utility Tool Window
Around July/August 2007 I set out to make my development life much easier. I created a Visual Studio tool window that would do some of this work for me. First and foremost, the primary objective was to help in the customization and content creation of structures needed in a Visual Studio project used for SharePoint development. Second, it was to eliminate the chance for typos and trivial errors. Third, to eliminate repetitive tasks and free me up to do the more complex stuff.
Today this tool window does essentially two things:
- Allows the developer to pick the folders to add to the project from the SharePoint 12 folder structure
- Automatically build the
*.ddfandmanifest.xmlfiles based on the contents of the project
I showed this tool window off in its very early (and very unstable) form at one of my sessions at SharePoint Connections Fall 2007 conference in Las Vegas in November 2007. A much more mature and stable version (but still very beta) was shown again at my sessions at the Office Developer Conference in San Jose (February 2008) and SharePoint Conference in Seattle (March 2008). Now, I’ve buttoned it up enough to share it with the community.
Requirements
- Visual Studio 2005 / 2008 (all versions except the Visual Studio Express Editions)
- DXCore v3.0.5 (or higher) by DevExpress
This tool window has been tested against the v3.0.5 build of DXCore in Visual Studio 2005 & 2008 as well as with just DXCore installed as well as with CodeRush & Refactor! Pro v3.0.5 installed.
Installation
Installation of the tool window is very straightforward. The tool window is 100% contained in a single assembly. This assembly needs to be copied to the DXCore plugins directory. This is usually in the following location: C:\Program Files\Developer Express Inc\DXCore for Visual Studio .NET\2.0\Bin\Plugins
You can verify where your plugin directory is by opening Visual Studio and selecting the menu DevExpress > About and clicking the Plug-ins button.
DXCore plugins are only loaded when DXCore loads… this only happens when Visual Studio loads. Therefore, once the assembly is copied to the DXCore plugins directory, close all instances of Visual Studio and reopen them to load the tool window.
Usage Instructions & How It Works
General
DevExpress has a free download called the DXCore. The DXCore is a framework that is available royalty-free from DevExpress for download and install. The DXCore sits on top of Visual Studio and provides a robust plugin framework. In fact, the two commercially available Visual Studio productivity add-ins by DevExpress (CodeRush & Refactor! Pro) are essentially plugin suites (with some extra hooks added into DXCore). Not only does the DXCore provide a plugin framework, but it also provides access to a lot of Visual Studio events and addresses some of the challenges with extending Visual Studio.
The assembly containing the SharePoint Project Utility tool window, once copied to the DXCore plugin folder (see the instructions section above), the next time Visual Studio loads the tool window will load as well. Once loaded, the tool window can be opened by selecting the menu DevExpress > Tool Windows > SharePoint Project Utility:
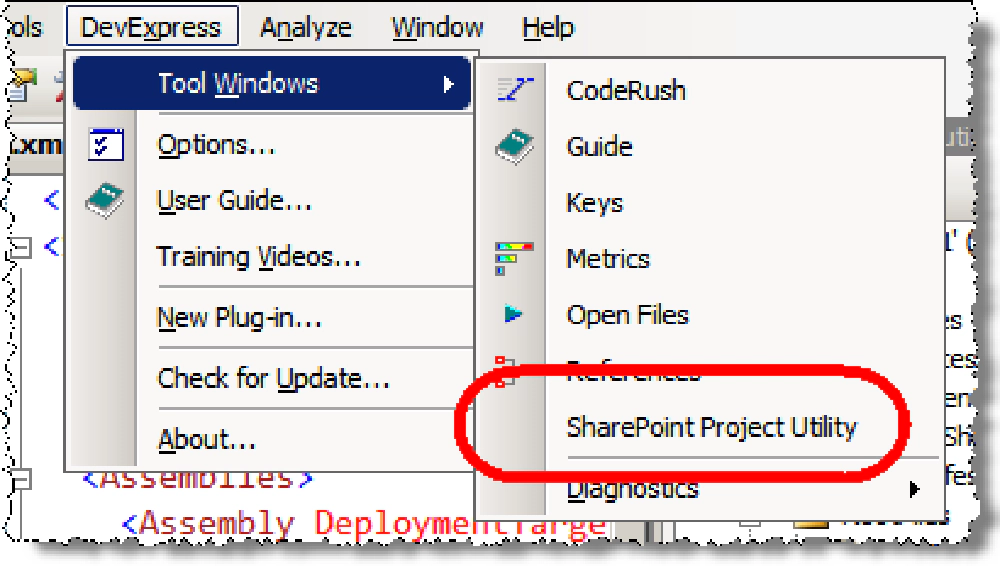
SharePoint Project Utility Tool Window
Once loaded, the SharePoint Project Utility tool window can be pinned or resized like any other tool window.
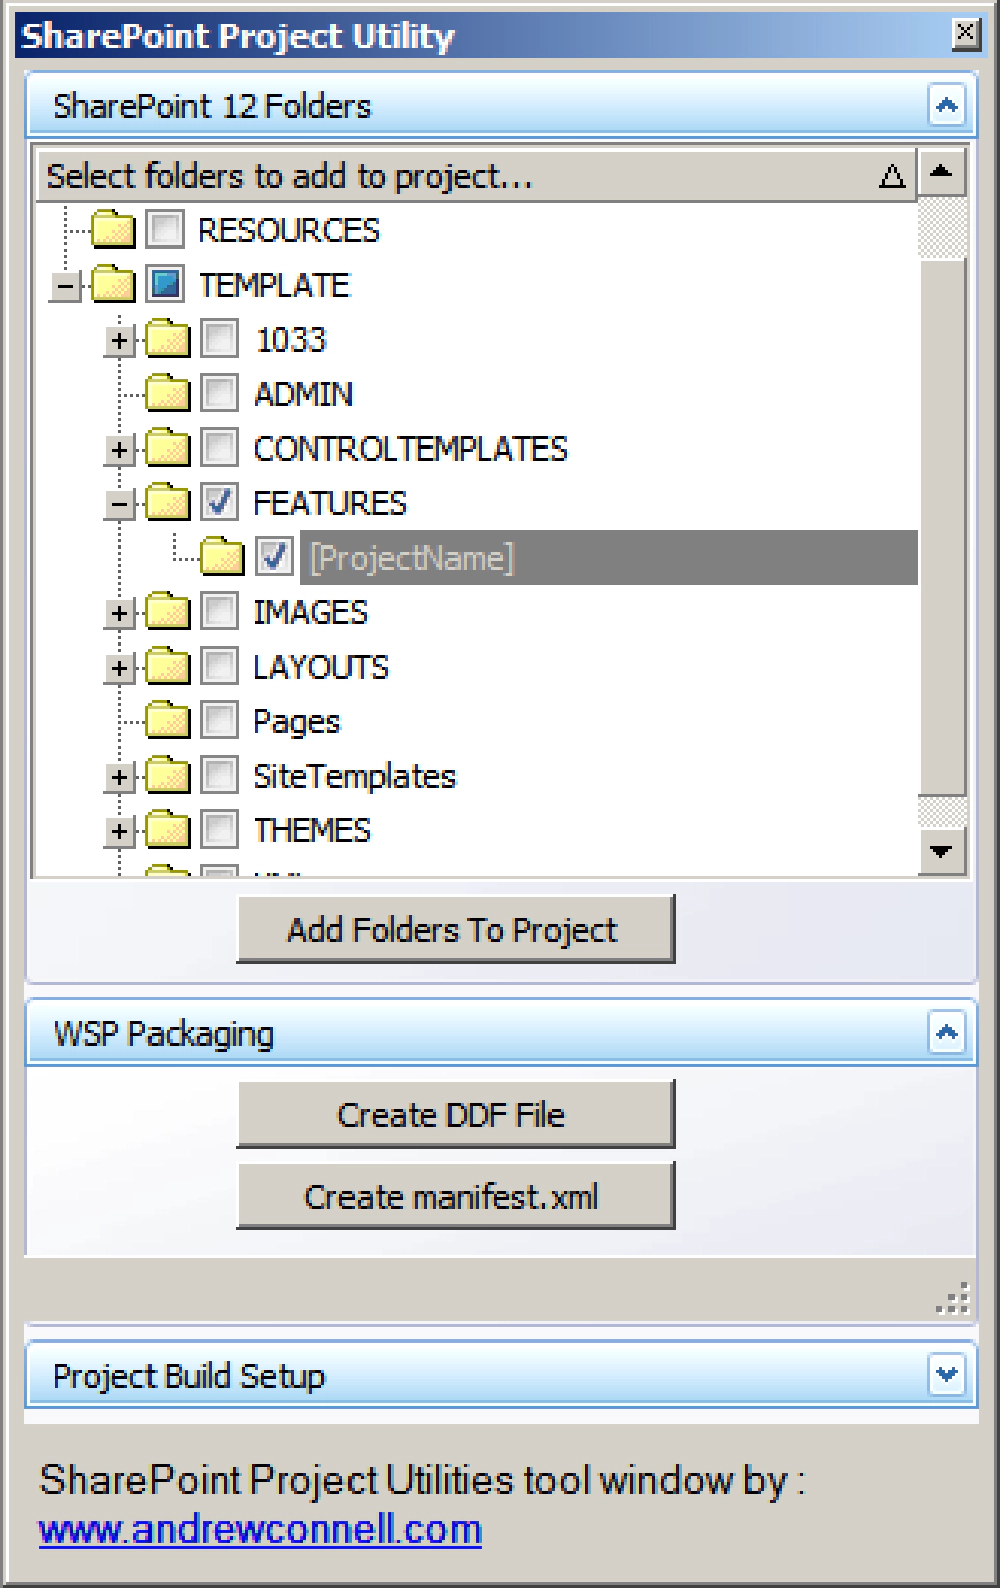
SharePoint Project Utility Tool Window
SharePoint /12/ Folder Assistant
For this to work, you must have a Visual Studio project loaded
The folder assistant is very straightforward. Simply select the folder(s) you want to add to the project by selecting the checkbox next to the folder and add them to the project by clicking the Add Folders To Project button. For example, checking the TEMPLATE\FEATURES\[ProjectName] folder will generate the following in an empty project template:
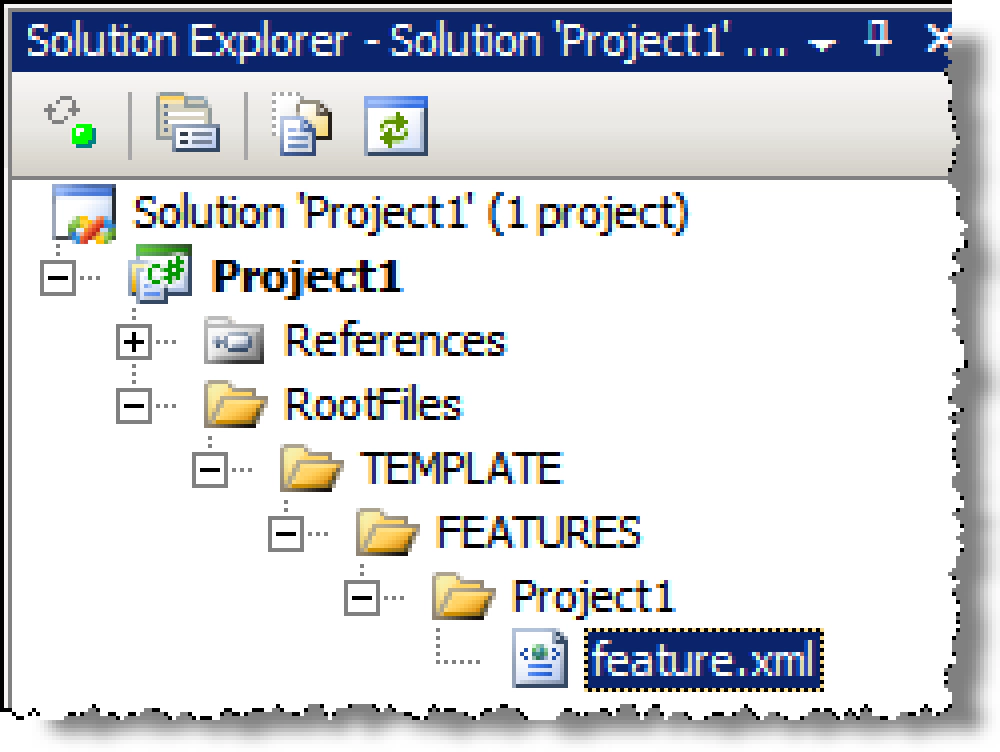
feature.xml in the Project Explorer
Notice how if you are creating a Feature folder, it creates a shell of a feature.xml file for you… that’s handy! Also notice how folders named [ProjectName] will be replaced with the name of the current project. All the other folders work in a similar way.
SharePoint Packaging (WSS Solution [*.wsp]) Assistant
For this to work, you must have a Visual Studio project loaded
Now that part that really saves you some time. All the files in a Visual Studio project have a BuildAction property. If you open the Properties window in Visual Studio (press F4 or View » Properties Window) and select a file, you will see it set to None|Compile|Content|Embedded Resource|CodeAnalysisDictionary. In the WSP Packaging section of the SharePoint Project Utility tool window you’ll notice two buttons.
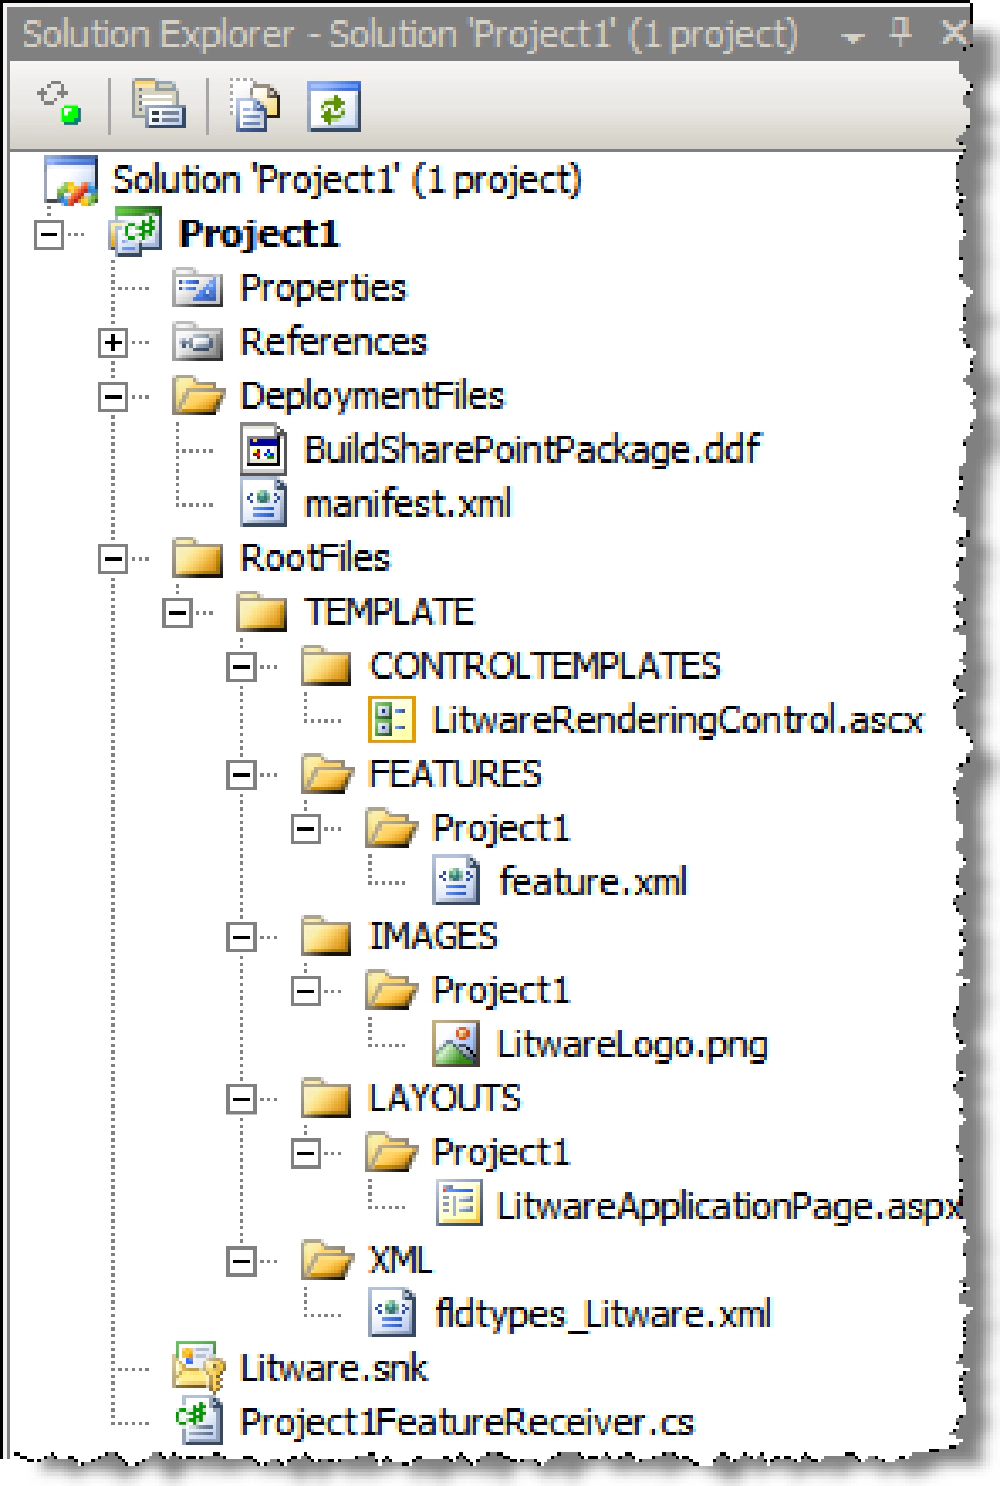
Clicking the Create DDF File button will trigger a process to collect an inventory of all files added to your Visual Studio project and record their build actions. All files set with a BuildAction=None will be ignored (such as *.snk key files). If any files are marked with BuildAction=Compile, a DLL will be added to the DDF file. All remaining files with BuildAction=Content will be listed in the DDF file with their respective folders kept intact.
If the DDF file is not present when clicking the button, it will be automatically generated. If it is already present, it will be completely overwritten so be aware of any chances you make because they will be lost when clicking the Create DDF File button.
Next, clicking the Create manifest.xml button will use the same file inventory and BuildAction property to generate the manifest.xml file. The process has some intelligence built in such that it automatically identifies Features and doesn’t deploy them using the node but rather with the node. Developers will likely need to go into this file and customize it to deploy assemblies to the GAC as they default to the Web application’s \bin and it defaults to no safe controls among other things. However, the SolutionID is ALWAYS preserved.
Like the DDF file, if the manifest.xml file is not present when clicking the button, it will be automatically generated. If it is already present, it will be completely overwritten so be aware any changes you make because they will be lost with clicking the Create manifest.xml button.
Check out the two following images. This one shows the project before clicking the buttons…
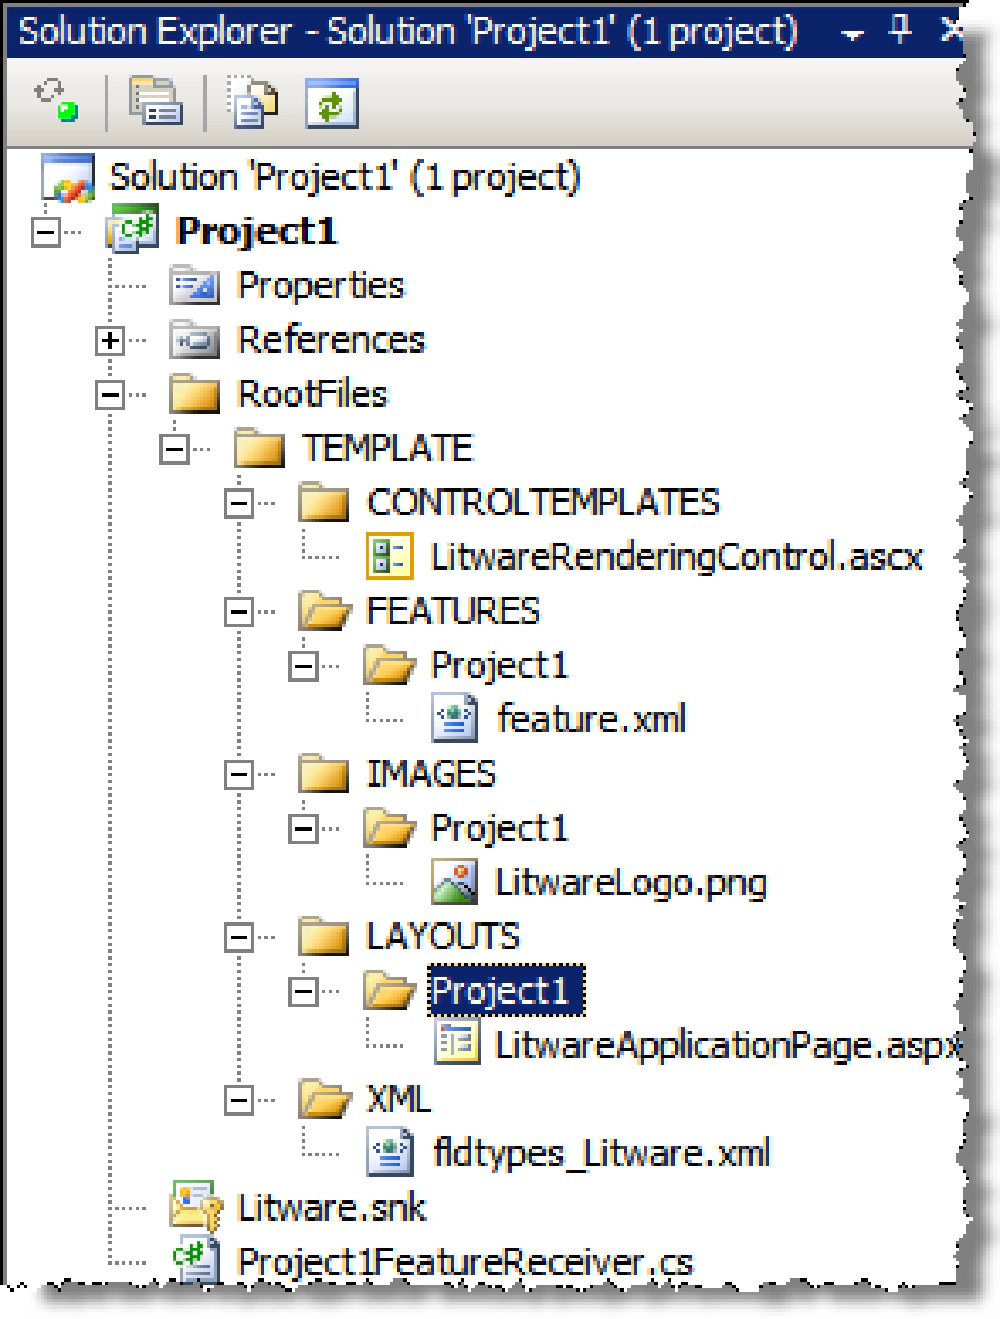
Before selecting the buttons
… and this one shows the after results:
After selecting the buttons
SharePoint Project Utility Tool Window Options
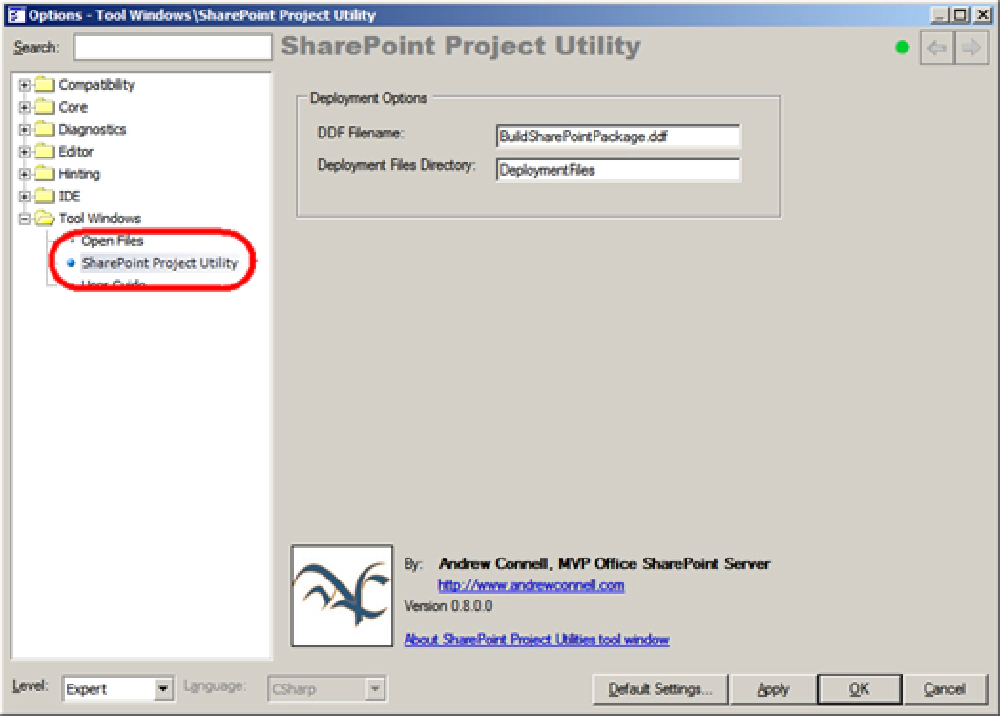
So what if you don’t like where I put these files or what I name the DDF file? No worries… just select the menu DevExpres » Options to bring up the DevExpress Options dialog for all the productivity tools and select the SharePoint Project Utility tool window as shown below:
DevExpress Options dialog
Use the provided textboxes to change the values of the DDF file name and where the deployment files are placed.
Known Issues & Bugs
This tool window is beta… very beta and therefore there are some known issues:
- The tool window expects your project structure to exactly match the commonly accepted structure many in the community are using where the relevant folders in the SharePoint “12” folder are duplicated in the Visual Studio project. Instead of using the name “12”, the name “RootFiles” is used for forward compatibility. Everything about the tool window is based off this structure. When the
*.DDF& manifest.xml files are build, they are looking for this exact path. If you don’t use this path, you will not get ideal results. There are no plans for changing this in the future. - Generating & regenerating the
*.DDFfile will always regenerate all the content, so changes will be lost. - Generating & regenerating the
manifest.xmlfile will always regenerate all the content (except the solutionID attribute). Certain elements are not generated:- for assemblies.
- for custom CAS policy file changes.
- for custom site definitions.
- for custom site templates.
- Note that the previous point also means if you add customizations to the
manifest.xmlfile for things like custom CAS policy file changes, they will be lost when regenerating themanifest.xmlfile. - Only supports creating a single Feature in the FEATURES subfolder.
FAQ
- Why is there a dependency on the DXCore? Couldn’t it have been built as a Visual Studio Tool Window with the Visual Studio Extensibility stuff? Maybe, but the DXCore provides a lot more stuff such as a code DOM that could be used in the future among other things. I simply elected to build off the DXCore. There are no plans to make this a generic Visual Studio tool window.
- I’ve copied the DLL to the correct folder, but I can’t see the SharePoint Project Utility Tool Window? Have you closed and restarted all instances of Visual Studio? The tool window plugin is loaded when Visual Studio loads.
- Are you seriously regenerating the entire manifest.xml file except the solutionID? I spent a ton of time working on my site definition and CAS policy changes. I know… and so do I. Trust me, I’m working to get that resolved… and it will be.
Where To Get More Information?
Where can you get additional information? Below you’ll find a handful of blog posts and screencasts. I think the screencasts are the best way to demonstrate exactly what these things can do.
Blog Posts
Change Log & Updates
- AC’s Visual Studio SharePoint Project Utility Window for SharePoint Developers Launched - v0.8
DevExpress’ CodeRush & Refactor! Pro
I wrote a post a while back giving my perspective on what these tools were all about. I think it’s a pretty good and quick read:
The next best place to go is to check the product pages for these two products on the DevExpress Web site:
- DXCore by DevExpress
- CodeRush by DevExpress
- Refactor! Pro by DevExpress
- DevExpress Forums: CodeRush for Visual Studio
- DevExpress Forums: Refactor! Pro for Visual Studio
I’ll admit, it’s hard to really get a grasp of these tools by simply reading some pages on a Web site. DevExpress saw this and added a bunch of screencasts to their site. Even after using these products on a daily basis, I pick up stuff every single time I watch these!