Last week I wrote how I migrated my site from a dynamic CMS to a static site generated using Hugo. The entire site and all supporting processes are hosted in the Microsoft cloud, specifically Azure DevOps & Microsoft Azure. In this post, I will explain how the site is hosted in Microsoft Azure. This assumes the static files have already been built so you will see how it’s exposed to the world. In a future
another post, I’ll explain how I go from writing a new post to building and releasing updates.
Hosting a static site on Microsoft Azure couldn’t be easier. There aren’t too many components used to implement the site and all but one is hosted from within Azure. I haven’t run the site for a full month so I don’t have an accurate cost yet, but I expect it to be a fraction of what I was spending previously.
Let’s start with a high-level view of the current set up as it is at launch in August 2019:
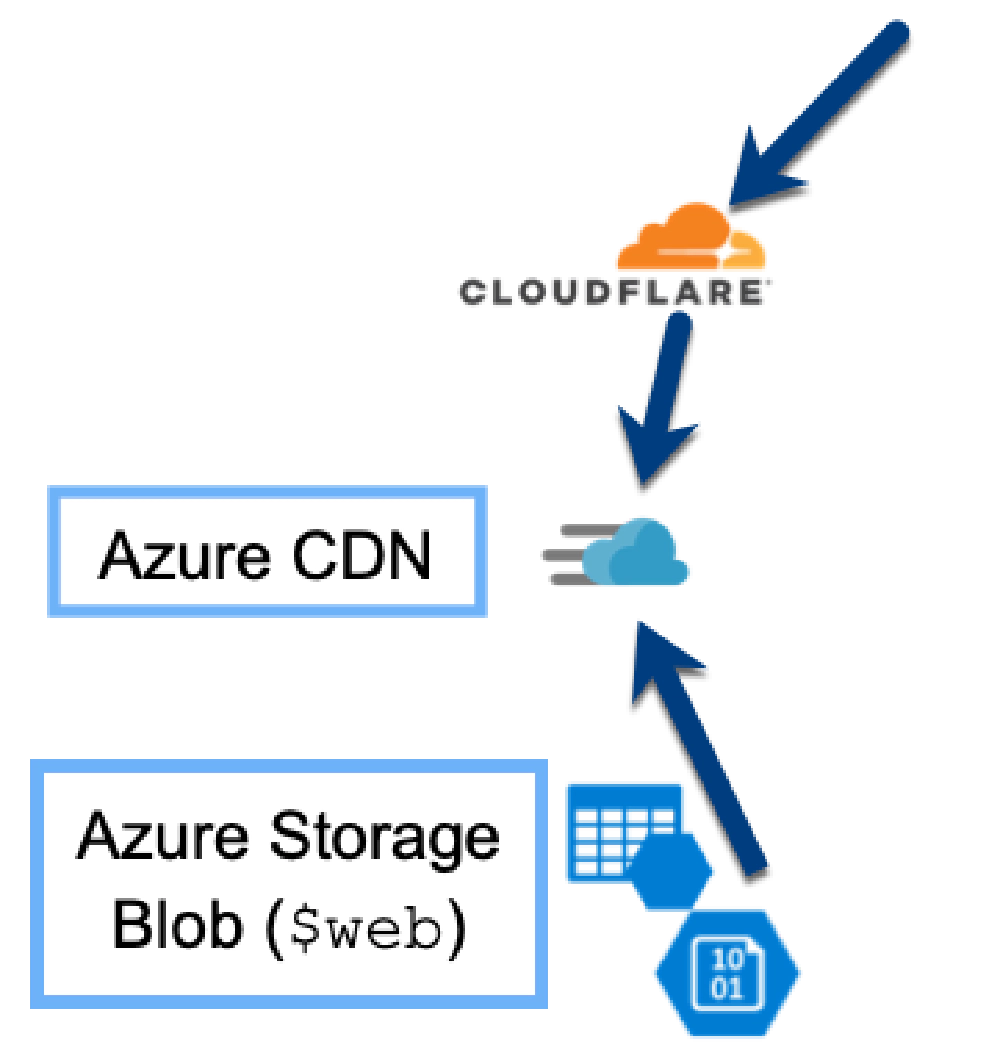
Hugo-implemented Static Site Hosting on Microsoft Azure
What happens when you navigate to https://www.andrewconnell.com?
- Your DNS request is resolved at Cloudflare where my DNS is hosted. That points to my Azure CDN.
- Azure CDN serves up the files in my site from different edge nodes around the world.
- If the CDN has the requested file in cache, it returns it to the caller. If not…
- The CDN pulls the file from where the files are stored, in an Azure Storage Blob container.
- While you navigate the site, I use Azure Application Insights to monitor performance, usage and other events on my site.
To prove it to you, here’s what my resource group looks like for the entire site as it stands in August 2019. There is one storage account resource I’m hiding that I’ll explain later. In addition, I’ve masked out some details on the CDN endpoint as it gives away the underlying URL. It doesn’t matter if you know what that is, but I’d prefer people bookmark and hit my site from my domain and not the *.azureedge.net domain the CDN endpoints use.
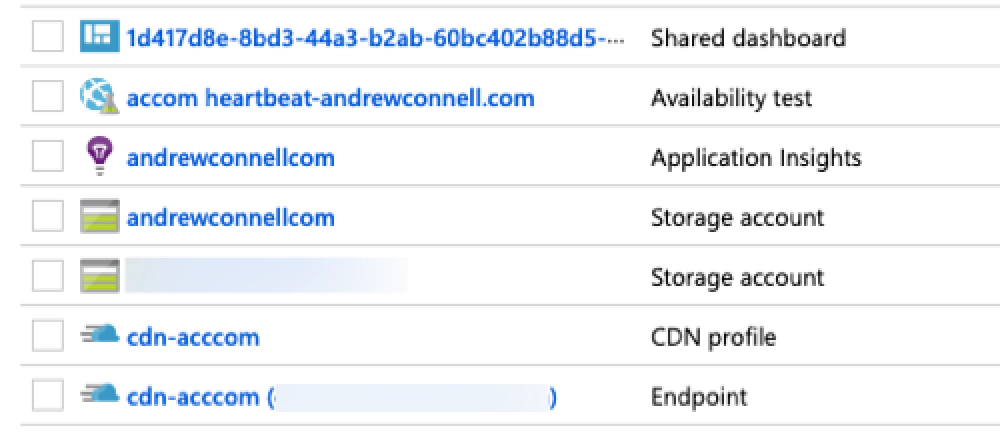
Azure resource group contents for www.andrewconnell.com
Now let’s dig into each of these components. I’ll start from the bottom up as that’s where you’ll start in your set up and configuration:
Azure Storage Blob & Static Web Sites
Static sites, as with dynamic sites, have files that live on a disk somewhere. That’s where I’ll start. As I mentioned previously, I am assuming the site is already built and you have files to host.
Because it’s a static site with no dynamic server-side component, I’m using an Azure Storage Blob to store the files. In addition, I’m using the static websites capability of Azure Storage Blobs to treat my storage container as a web server.
After creating the Azure Storage Blob resource, select the Static website option in the navigation and flip the toggle to Enabled.
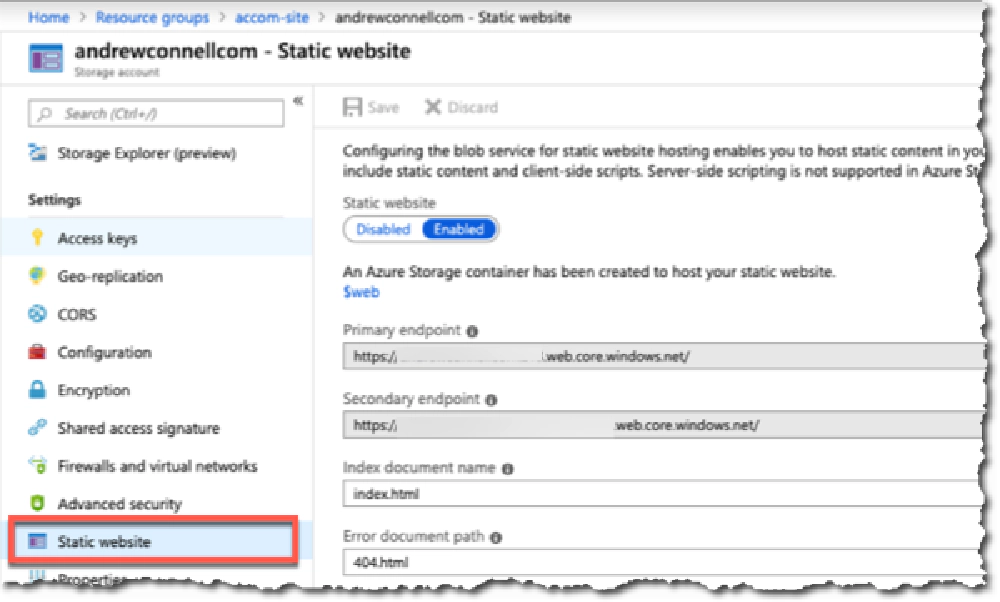
Azure Storage Blob Static websites
Azure will generate a URL for you in the form of https://<storageaccount>.z##.web.core.windows.net. It will also create a blob container $web where you can upload your files to.

Azure Storage Blob Static websites
At this point, you can upload your site using your favorite method and hit the site. If manual, I prefer the Azure Storage Explorer. However I prefer doing it in an
automated CI/CD way using Azure DevOps, something I’ll show you how I do in a future post.
The Azure docs walk you through the above process in an easy to follow tutorial: Tutorial: Host a static website on Blob Storage.
At this point we are serving up our static site from Azure, but the domain isn’t pretty. While you can set a custom domain on the Azure Storage Blob, I prefer to front it with a CDN for performance reasons & to have a bit more control over the URL.
Azure CDN
While the static site served up by Azure Storage Blobs is fast, it can be even faster. I’ve use an Azure CDN for this.
The first step is to create a CDN Profile resource in Azure. For this, you just pick a name and pricing tier.
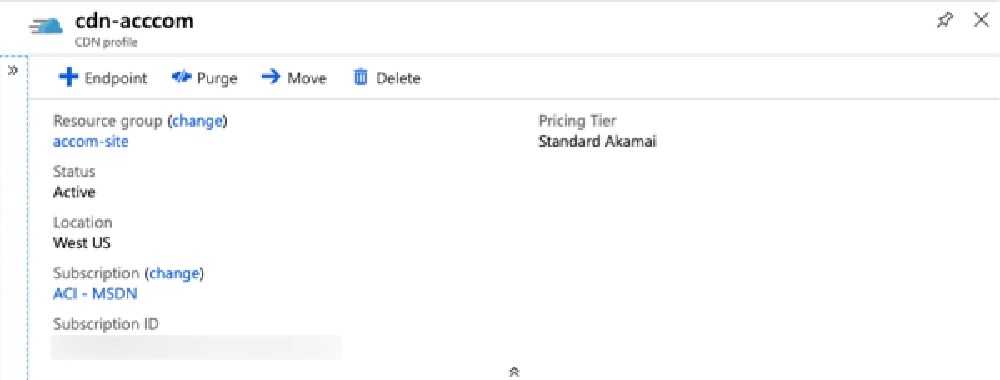
Azure CDN Profile
Now that you have a profile set up, the next step is to create an endpoint. Select the Endpoint button in the top menu and fill out the form provided.

Azure CDN Endpoint
- Name: prefix of the url you’d like to use, so
contosoresults incontoso.azureedge.net - Origin type: Custom Origin
- Origin hostname: domain part of the static website, like
contoso.z55.web.windows.net - Origin path: leave blank
- Origin host header: same as the “Origin hostname” above
- Protocols: default 80 & 443
- Optimization type: unless you have a reason otherwise, leave default
Here’s what mine looks like after I set it up:
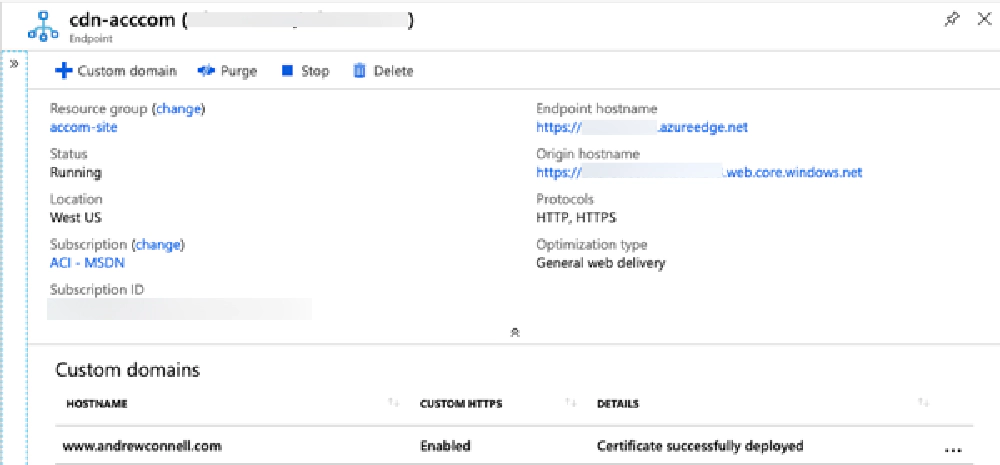
Azure CDN Profile with an Endpoint
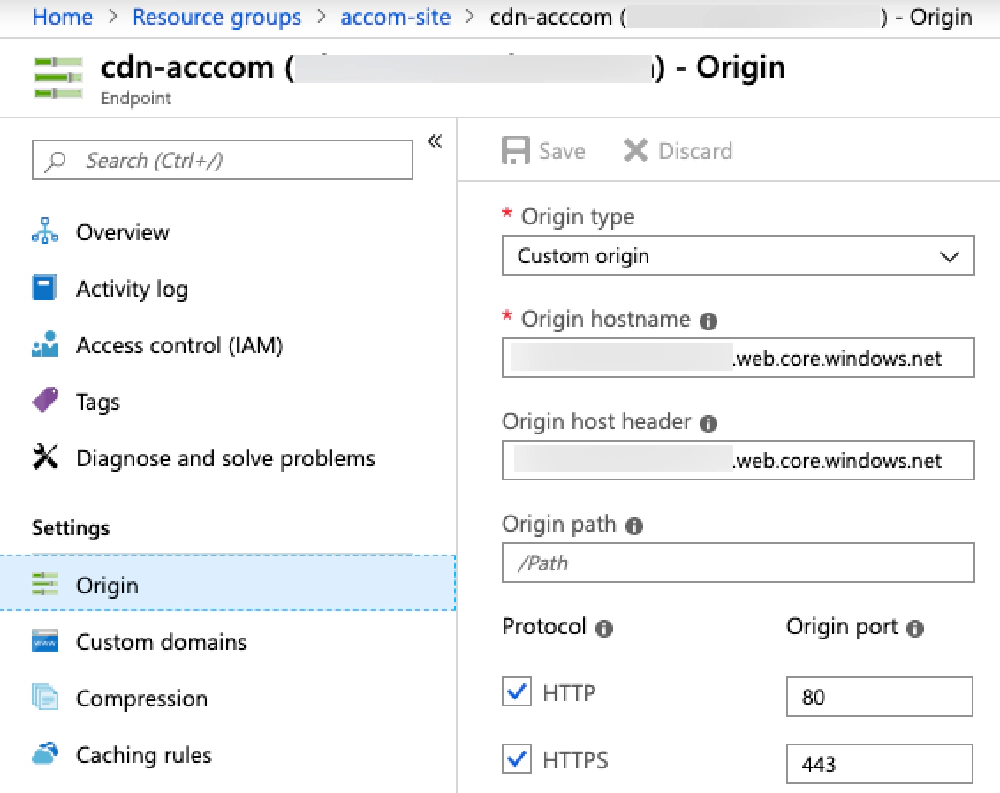
Azure CDN Endpoint Origin settings
From here, you’re free to control the compression, caching rules, geo-filtering & optimizations options for your endpoint. I have mine left as the default options, except for the caching rules where I specify:
- Global caching rules
- Caching behavior: not set
- Query string caching behavior: Ignore query string
- Custom caching rules
Match condition Match Value Caching behavior Days:Hours:Minutes:Seconds UrlFileExtention html Override 0:6:0:0 UrlFileExtention jpg,png,gif Override 7:0:0:0 UrlFileExtention css,svg,zip,js,pdf Override 7:0:0:0 UrlPath /something/feed.xml BypassCache
Add a Custom Domain to the CDN Endpoint
I have a custom domain, www.andrewconnell.com, that I want to use. What I need to do is head over to my DNS and create a CNAME record www that points to the address of my CDN Endpoint.
Cloudflare has my DNS records. Before you add a custom domain to the Azure CDN Endpoint, you need to set up the record. If you are also using Cloudflare, make sure when you set this up, you turn off proxying for the record in Cloudflare while adding, otherwise, Azure won’t be able to validate the domain.
Back on the CDN Endpoint screen, add the domain. It can take a few minutes for your DNS record to propagate around the world depending who you use for your DNS. With Cloudflare, it’s almost immediate.
Once that’s done, you then need to configure the CDN Endpoint to support HTTPS on your custom domain. That’s the next step
Enable SSL on the Custom Domain
The way Azure does this is they will first verify you own the domain, then issue a request for a free SSL cert from LetsEncrypt and install it on your CDN Endpoint. This process can take a long time… they say up to 6 hours. For my site and for the Microsoft Cloud Show, it took 4-5 hours so be patient… the Certificate provisioning step takes the longest.
This is pretty easy… you just select your custom domain in the CDN Endpoint screen, and set the custom domain selector to on. Once the process is complete, it looks like this:
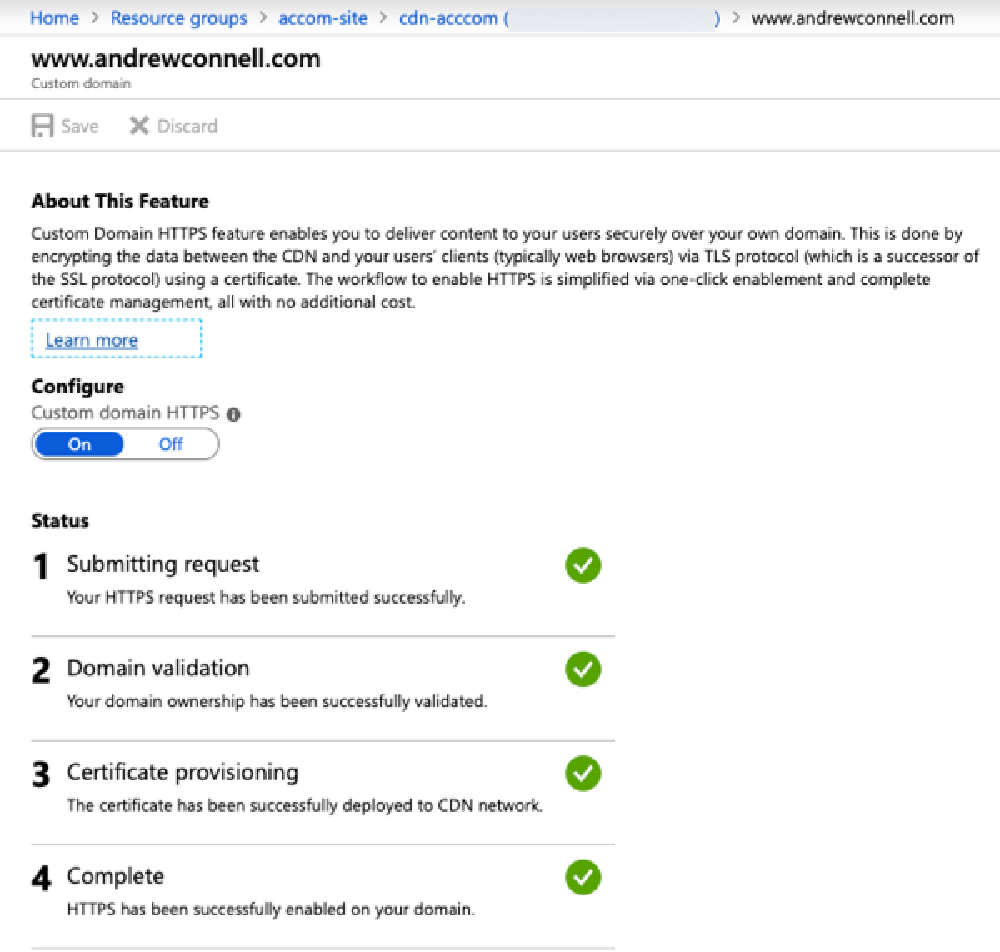
Azure CDN Endpoint custom domain HTTPS
Now when you look at your CDN Profile, you see your custom domain is set up with HTTP and HTTPS!
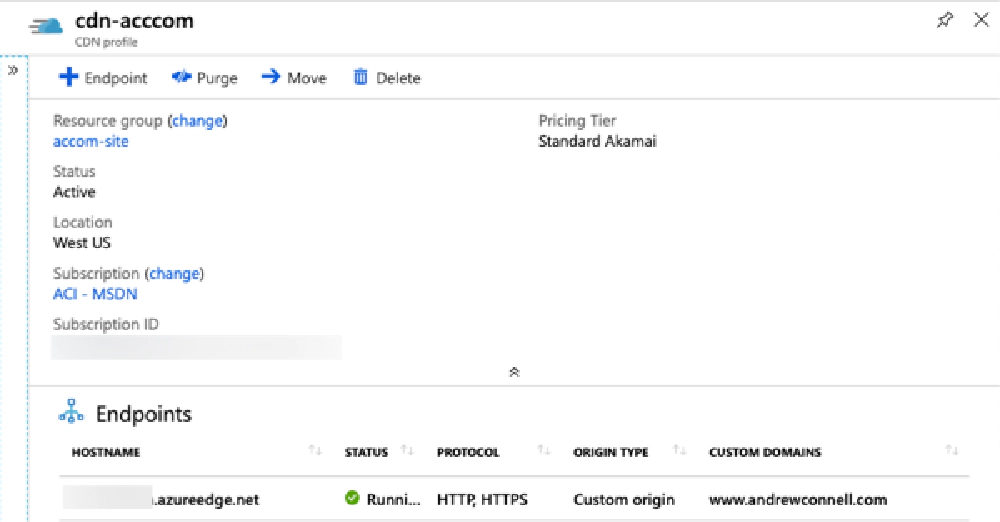
Azure CDN Profile
The Azure docs walk you through the above process in an easy to follow tutorial: Tutorial: Use Azure CDN to enable a custom domain with SSL for a static website
Cloudflare
I’m listing this step for the sake of completeness. As I said above, I’m also using Cloudflare to host my DNS, but they also provide some additional features.
While they do also offer up a CDN, I prefer to use the Azure CDN for now. Why? How about “just because”…
Here’s the relevant DNS entries in case you’re interested:

Cloudflare DNS settings
One thing about these settings. The A record is not pointing to my site… it’s pointing to the old IP that I had set for my old OrchardCMS site hosted in an Azure Web App. There’s no IP to point to for an Azure Storage Blob static website, and when I remove it, the redirects I’m going to mention in a moment don’t work. If I add a CNAME at the root pointing to the same location as the www record, Cloudflare wants to flatten it but that also causes routing issues.
To be entirely transparent, I don’t understand how to fix it, but the way I have it set above is working, so I’m leave it as is. If you’ve got an idea, drop a comment!
The feature I really like about Cloudflare are the three free page rules. These allow me to only host the site on https://www.andrewconnell.com and not deal with a naked URL https://andrewconnell.com and force all requests to be over https.
Here are the three page rules I set up. These will always redirect any request to any page on my site to always be over https and start with www:
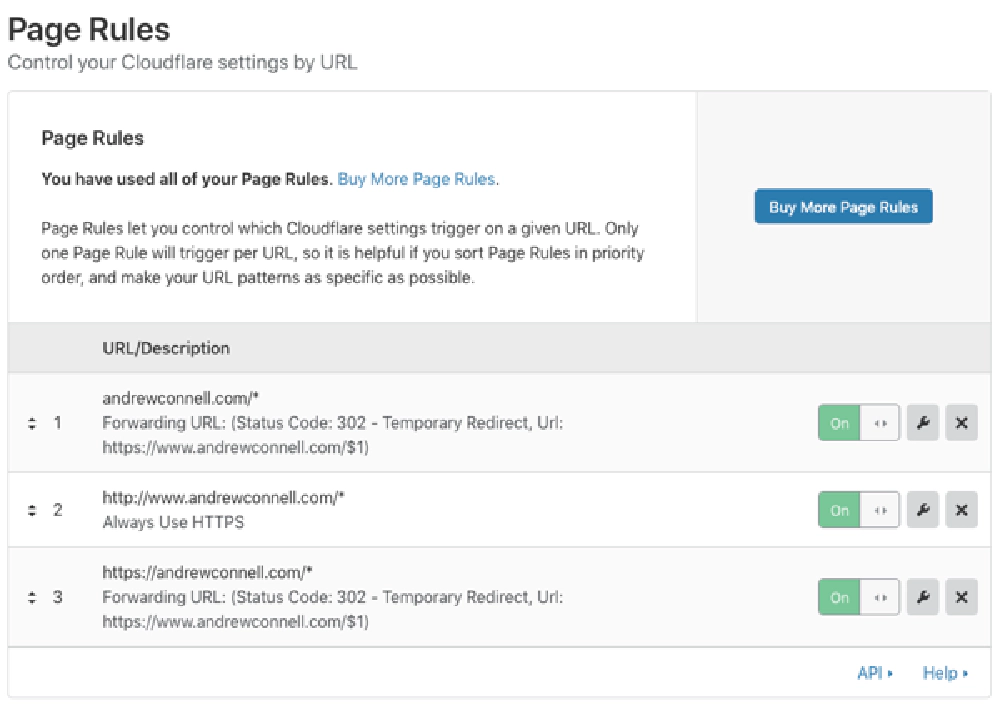
Cloudflare Page Rules
Running a preview site
The only other thing I have set up is a preview site. Hugo has the ability to let you publish and expire pages in the future as well as have draft content. When you do this, a normal build will include/exclude these files based on their settings at the time you build the site.
However, you can build the site with special flags (--buildDrafts, --buildExpired, --buildFuture) to include them. Every time I push an update to master,
my automated CI/CD process builds two sites: a live site & a preview site.
This way, I can alway see what my site will look like in the future if I have a post that is going to be published later or let someone preview something.
That preview site is the other storage account I masked out of the image at the start of the post.
Summary
There you have it. Hosting a static website using Azure Storage Blobs, optimized with Azure CDN. In a future this post,
Automated Hugo Releases with Azure DevOps, I show you how I automate all the builds & deployments on the site. Down the road, I plan to add some additional features to the site, like a search capability using Azure Search. Keep an eye on the
Hugo category of posts to for related posts to hosting a Hugo site on Azure.