You’ve probably seen how to create Azure resources using the Azure portal. But that’s a manual process and easily screw-up-able when you need to repeat the resource creation for multiple projects, or when moving from dev to production, or deploying your customer’s solution to their Azure subscription.
Wouldn’t it be better to script the resource creation and configuration process to ensure it’s the same every time? What about versioning your resource configuration so it’s part of your code?
You can with Infrastructure-as-Code, or IaC. IaC is popular in the DevOps world and fits nicely alongside a complete CI/CD process. It involves creating your resources from machine-readable files that can be versioned with your project in source control.
In this article, I’m going to start with a blank slate and show you how to use Bicep, a domain-specific language from Microsoft to create Azure resources for an Azure Function App.
What is Bicep?
OK, let’s start with the question - What is Bicep?
But first, let’s talk about ARM.
You might be familiar with something called the Azure Resource Manager, also known as ARM. ARM templates are big JSON documents that you can use to deploy Azure resources. They also have the ability to accept parameters or inputs, so you can create variables for things like resource names, settings, SKUs, IP addresses, and domain names just to name a few things.
But they aren’t terribly friendly to work with… because they’re huge.
So, Microsoft set out to simplify the challenges with ARM templates. They wanted to create something that had a concise syntax, reliable type safety, and support for code reuse.
That’s what Bicep is. It’s a domain-specific language, or DSL, that provides a much richer and more productive authoring environment than ARM.
In fact, you can compile a Bicep file down to an ARM template and vice versa!
Bicep has a ton of benefits… Microsoft touts that Bicep has support for all resource types and API versions, a simple syntax (especially compared to those ARM JSON templates), a better authoring experience thanks to a VSCode extension that gives us type safety, IntelliSense, and syntax validation.
The result of a deployment to Azure with Bicep is repeatable, giving you confidence in your CI/CD process, you don’t have to worry about the ordering complexities of the resource creation… you deploy with one command and it takes care of it for you. It’s also very modular so you can break it up into different components, called modules.
You can even preview what’s going to happen with your deployment with the what-if operation! See what will be created, deleted, updated, and any properties that will get changed! And best of all, it’s included with Azure… you don’t pay for a thing and it’s fully supported by Microsoft Support.
OK, that’s your Bicep overview firehose sales pitch… let’s see it!
Explain the scenario
Let’s look at a common scenario. Let’s say you want to create an Azure Function app. While it’s simple in the Azure portal, the wizard you go through in creating it is collecting enough information on creating the resource. Let’s see that…
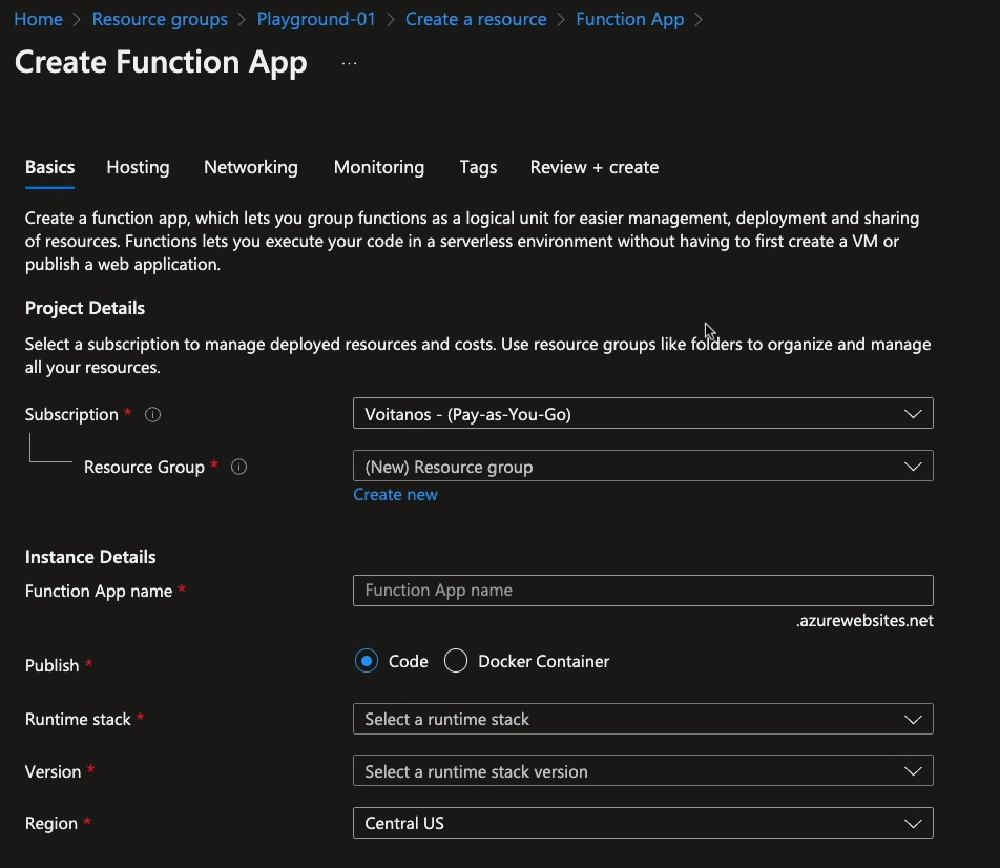
Azure Portal - create Azure Function App
What does that process we create?
It creates a storage account, an app service plan, or a hosting plan where everything will run, and the Azure Function app.
It also creates an instance of Application Insights that’s used to monitor the function app & connects the function app to the AppInsights instance.
Let’s see how to do all that with Bicep!
Set up development environment
First, let’s make sure our development environment is set up. There’s nothing to do with Azure, but I need to make sure I have some stuff done on my laptop.
To create a deployment with your Bicep file, you’ll use the
Azure CLI
. Bicep is provided as an extension to the CLI. Check if you’ve already installed Bicep by running az bicep version. If it’s not installed, install it by running az bicep install in the console.
Next, make sure you’re logged into Azure with the CLI and set the subscription where I want to create these resources. To set the subscription, use the Azure CLI to first get a list of all the subscriptions you have access to and then set it, using the following commands:
# get list of subscriptions
az account list
# set current subscription
az account set --subscription {SUBSCRIPTION_GUID}
# confirm intended subscription is set
az account show
Next, make sure VSCode has the Bicep extension installed.
And with that, my laptop is good to go!
Create a resource group as a deployment container
The first thing I’ll do is create a resource group where I want to put everything. I can do that using the Azure Portal or via Azure CLI. Use the group create command to do this with the CLI:
RESOURCEGROUP=PlaygroundBicep
az group create --name $RESOURCEGROUP --location eastus --tags lifecycle=disposable
Create Bicep file
With everything set up, let’s get started creating our Bicep file!
When you do this, you want to think about your dependency tree. Like “I’m creating a function app, but that needs a hosting plan, so I should create that first. And my function app needs a storage account to store logs and things, so I need to create that before the function app too.”
Bicep parameters
Let’s start by creating the basics of our Bicep file.
I’ll start with what I want my inputs, known as parameters, to be. These enable my Bicep file to be reusable across projects.
param location string = resourceGroup().location

@description('Resource name prefix')
param resourceNamePrefix string
var envResourceNamePrefix = toLower(resourceNamePrefix)

@description('Deployment name (used as parent ID for child deployments)')
param deploymentNameId string = '0000000000'

@description('Name of the staging deployment slot')
var functionAppStagingSlot = 'staging'
Storage account
Now, let’s create that storage account. This is done using the
Microsoft.Storage/storageAccounts
type. Using the location parameter I previously defined to put the storage account in the same Azure region as the resource group. I’m also using string interpolation to set the name of the resource using the envResourceNamePrefix parameter.
/* ###################################################################### */
// Create storage account for function app prereq
/* ###################################################################### */
resource azStorageAccount 'Microsoft.Storage/storageAccounts@2021-08-01' = {
  name: '${envResourceNamePrefix}storage'
  location: location
  kind: 'StorageV2'
  sku: {
    name: 'Standard_LRS'
  }
}
var azStorageAccountPrimaryAccessKey = listKeys(azStorageAccount.id, azStorageAccount.apiVersion).keys[0].value
When we create the function app, one of its app settings needs the connection string for the storage account. So what I’ll do is create a variable and use the [**listKeys()**](https://learn.microsoft.com/azure/azure-resource-manager/bicep/bicep-functions-resource#listkeys) Bicep function to get the primary & secondary from the storage account… the primary key is the first one in the array that’s returned.
Application Insights
Next, let’s create the AppInsights instance. Do this using the Microsoft.Insights/components type. The settings are fairly self-explanatory.
/* ###################################################################### */
// Create Application Insights
/* ###################################################################### */
resource azAppInsights 'Microsoft.Insights/components@2020-02-02' = {
  name: '${envResourceNamePrefix}-ai'
  location: location
  kind: 'web'
  properties:{
    Application_Type: 'web'
    publicNetworkAccessForIngestion: 'Enabled'
    publicNetworkAccessForQuery: 'Enabled'
  }
}
var azAppInsightsInstrumentationKey = azAppInsights.properties.InstrumentationKey
Similar to creating the storage account, we’ll need the AppInsights instrumentation key for the function app, so I’ll stuff that in a variable as well.
Function App + Hosting Plan
Now for the main event: the function app. First, I’ll create the Azure hosting plan. Do this using the Microsoft.Web/serverfarms type:
resource azHostingPlan 'Microsoft.Web/serverfarms@2021-03-01' = {
  name: '${envResourceNamePrefix}-asp'
  location: location
  kind: 'linux'
  sku: {
    name: 'S1'
  }
  properties: {
    reserved: true
  }
}
Oh, there’s something I want to show you. The VSCode Bicep extension can show you a visualization of the resources you’re creating… cool right? You can even click a resource and jump to it in the Bicep file.
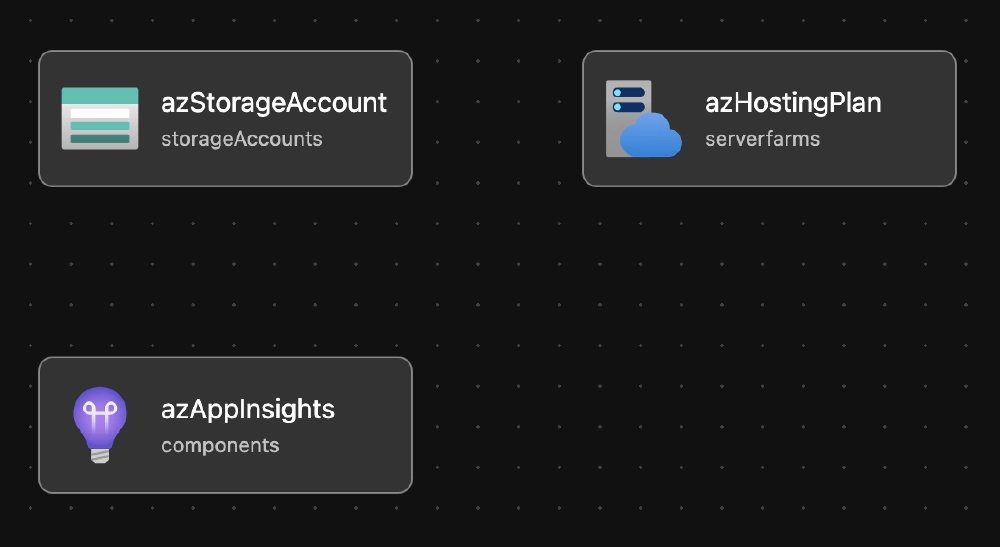
VSCode Bicep Extension - visualization of resources in a Bicep file
So that might not be too exciting but watch this; remember our function app will have a dependency on our hosting plan?
Let’s create the function app next. Do this using the Microsoft.Web/sites type:
resource azFunctionApp 'Microsoft.Web/sites@2021-03-01' = {
  name: '${envResourceNamePrefix}-app'
  kind: 'functionapp'
  location: location
  identity: {
    type: 'SystemAssigned'
  }
  properties: {
    httpsOnly: true
    serverFarmId: azHostingPlan.id
    clientAffinityEnabled: true
    reserved: true
    siteConfig: {
      alwaysOn: true
      linuxFxVersion: 'NODE|14'
    }
  }
}
Keep the visualization up as you’re adding the code for the Function app when you get to the properties.serverFarmId property. The extension is picking up the dependency and drawing a link between the resources to show it:
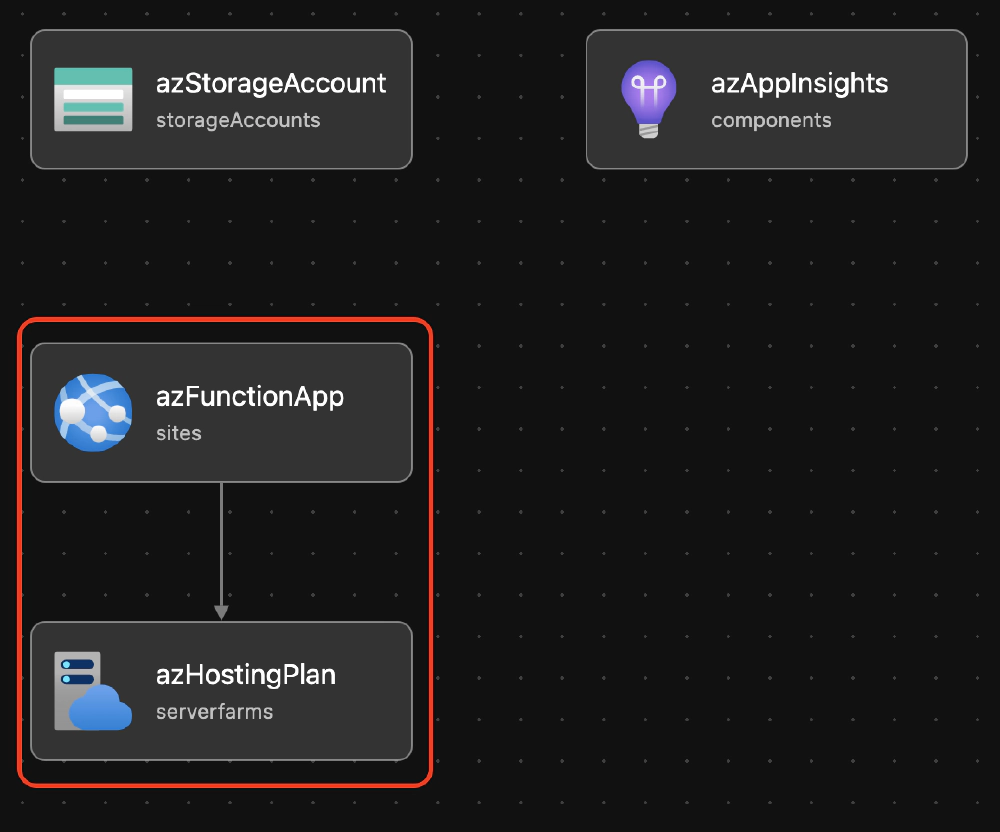
VSCode Bicep Extension - visualization of resource dependency
Function app slots
Function apps, like web apps in Azure, can have deployment slots depending on the hosting plan you selected. I love using these and in my article How to: CI/CD/IaC for Azure Function Apps and GitHub Actions , I show you how I use them with my Azure Functions for a completely automated CI/CD process including swapping the slots.
But we need slots first. We already have one production lot by default when we create the function app, but we need a staging slot. So let’s create that using the Microsoft.Web/sites/slots type:
/* ###################################################################### */
// Create Function App's staging slot for
//   - NOTE: set app settings later
/* ###################################################################### */
resource azFunctionSlotStaging 'Microsoft.Web/sites/slots@2021-03-01' = {
  name: '${azFunctionApp.name}/${functionAppStagingSlot}'
  location: location
  identity: {
    type: 'SystemAssigned'
  }
  properties: {
    enabled: true
    httpsOnly: true
  }
}
Function app - app settings
But wait, did we forget something? A function app needs some application settings defined when it’s created, right? That’s how AppInsights gets wired up along with a few other things like the supported functions runtime and more.
I didn’t forget anything… I created things like this intentionally. Here’s what’s going on: I want the slots in my function app to have mostly all the same app settings, except I want one property to be slot specific. That means I don’t want it to change when I swap slots… I want it to keep the same setting.
In the Azure portal, you do this by checking a box, but when. You provision it with the Resource Manager, you first have to tell the function app that one setting is slot specific, and then you set ALL the app settings on each slot independently.
So… here’s how we’ll do this:
First, I’ll tell the function app that it has one setting that’s slot specific. You do that with the
Microsoft.Web/sites/config
resource and set its name to slotConfigNames. Then I list all the app settings I want to be slot specific to the appSettingsNames property.
/* ###################################################################### */
// Configure & set app settings on function app's deployment slots
/* ###################################################################### */
// set specific app settings to be a slot specific values
resource functionSlotConfig 'Microsoft.Web/sites/config@2021-03-01' = {
  name: 'slotConfigNames'
  parent: azFunctionApp
  properties: {
    appSettingNames: [
      'APP_CONFIGURATION_LABEL'
    ]
  }
}
Lastly, I need to set the app settings on both slots. But let’s do this with a special capability in Bicep: modules !
App settings via modules
Let’s create a new bicep file, appservice-appsettings-config.bicep, that we’ll use to set our app settings on the slots. I need a few input parameters like the App Insights instrumentation key, the storage account’s details, the function app name & the staging slot name.
param applicationInsightsInstrumentationKey string
param storageAccountName string
param storageAccountAccessKey string
param appConfigurationName string
param functionAppName string
param functionAppStagingSlotName string

@description('Value of "APP_CONFIGURATION_LABEL" appsetting for production slot')
param appConfiguration_appConfigLabel_value_production string = 'production'
@description('Value of "APP_CONFIGURATION_LABEL" appsetting for staging slot')
param appConfiguration_appConfigLabel_value_staging string = 'staging'
I’ll also create a parameter with default values for that slot-specific app setting.
Now, because both slot’s app settings mostly mirror each other, I’ll create a common variable BASE_SLOT_APPSETTINGS that contains all the settings shared by both slots. I’ll use string interpolation to not just create these name-value pairs, but also concatenate strings for the values.
/* base app settings for all accounts */
var BASE_SLOT_APPSETTINGS = {
  APP_CONFIGURATION_NAME: appConfigurationName
  APPINSIGHTS_INSTRUMENTATIONKEY: applicationInsightsInstrumentationKey
  APPLICATIONINSIGHTS_CONNECTION_STRING: 'InstrumentationKey=${applicationInsightsInstrumentationKey}'
  AzureWebJobsStorage: 'DefaultEndpointsProtocol=https;AccountName=${storageAccountName};EndpointSuffix=${environment().suffixes.storage};AccountKey=${storageAccountAccessKey}'
  FUNCTIONS_EXTENSION_VERSION: '~3'
  FUNCTIONS_WORKER_RUNTIME: 'node'
  WEBSITE_CONTENTSHARE: toLower(storageAccountName)
  WEBSITE_CONTENTAZUREFILECONNECTIONSTRING: 'DefaultEndpointsProtocol=https;AccountName=${storageAccountName};EndpointSuffix=${environment().suffixes.storage};AccountKey=${storageAccountAccessKey}'
}
Now, let’s set the production slots settings. I’ll do that by creating a new variable with just the value for the production slot. Set the value using the same Microsoft.Web/sites/config resource and set the name to the name of the function app and add appsettings to the end of the name. The value of the properties I’m setting will use the Bicep union()
function to merge the base & production settings together.
/* update production slot with unique settings */
var PROD_SLOT_APPSETTINGS ={
  APP_CONFIGURATION_LABEL: appConfiguration_appConfigLabel_value_production
}
@description('Set app settings on production slot')
resource functionAppSettings 'Microsoft.Web/sites/config@2021-03-01' = {
  name: '${functionAppName}/appsettings'
  properties: union(BASE_SLOT_APPSETTINGS, PROD_SLOT_APPSETTINGS)
}
I’ll repeat the process for the stating slot, but instead, use the resource Microsoft.Web/sites/slots/config and use the name of the staging slot to specify these settings.
Now, to call this, I’ll jump back to my main Bicep file and use the module keyword to call my module. I’m going to give it a specific name, unique to the deployment, and you’ll see why in a moment.
To set the input parameters, I’ll just set those using the params property on the object.
// set the app settings on function app's deployment slots
module appService_appSettings 'appservice-appsettings-config.bicep' = {
  name: '${deploymentNameId}-appservice-config'
  params: {
    appConfigurationName: azAppConfiguration.name
    appConfiguration_appConfigLabel_value_production: 'production'
    appConfiguration_appConfigLabel_value_staging: 'staging'
    applicationInsightsInstrumentationKey: azAppInsightsInstrumentationKey
    storageAccountName: azStorageAccount.name
    storageAccountAccessKey: azStorageAccountPrimaryAccessKey
    functionAppName: azFunctionApp.name
    functionAppStagingSlotName: azFunctionSlotStaging.name
  }
}
Update output settings
The last step is to update the output settings. This isn’t necessary, but you’ll see why I do this in my article How to: CI/CD/IaC for Azure Function Apps and GitHub Actions where I use this Bicep file in my CI/CD process:
/* define outputs */
output appConfigName string = azAppConfiguration.name
output appInsightsInstrumentionKey string = azAppInsightsInstrumentationKey
output functionAppName string = azFunctionApp.name
output functionAppSlotName string = functionAppStagingSlot
Let’s look at that visualization! Notice how we can see the nested module in our main Bicep visualization? This is cool… we can use this module on its own too if we want!
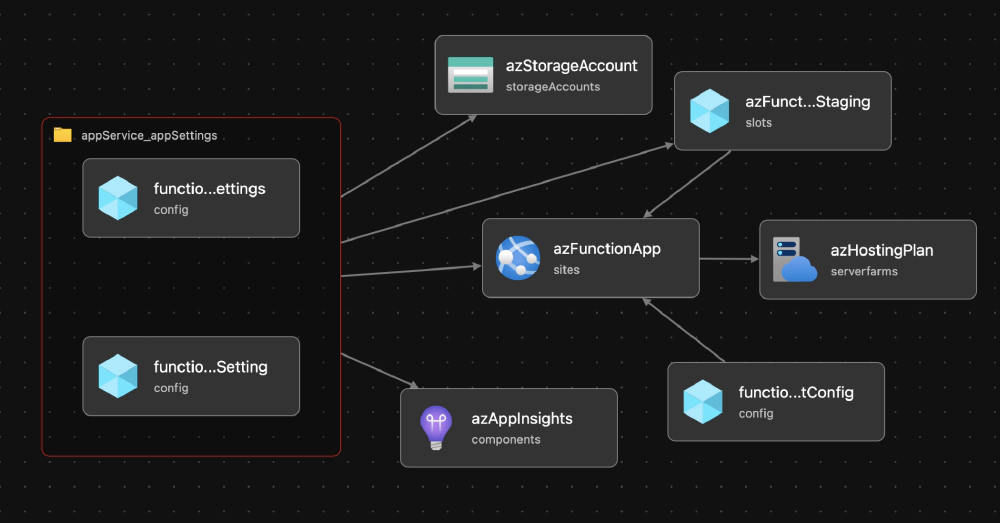
VSCode Bicep Extension - visualization of entire Bicep file
Running the Azure resource creation process with Bicep
Let’s see if it works!
I’ll go back to the console and use the Azure CLI to create a new deployment.
az deployment group create
  --name MyDeploy1
  --resource-group $RESOURCE_GROUP
  --template-file main.bicep
  --parameters
    deploymentNameId=MyDeploy1-1
    resourceNamePrefix=zarya
If it takes a second to get started, that’s a good sign, because it likely means that the Bicep file is valid.
I’m going to jump over to the Azure portal, into the resource group where we’re deploying this, and look at deployments.
Here we can see our deployment is in the process!
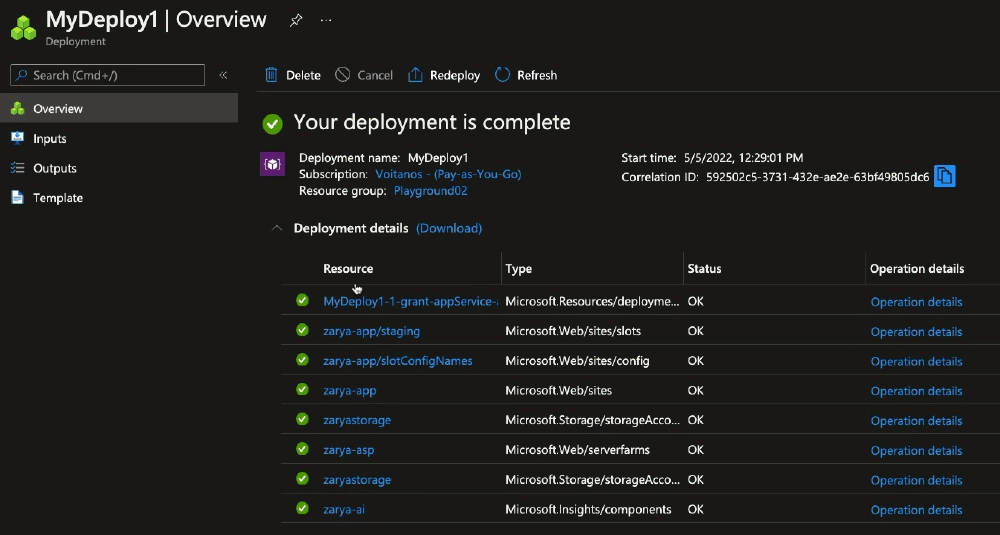
Azure Portal - deployment summary
One cool aspect of this deployment as we can see it in the Azure portal is that you can see the inputs and outputs passed in and out of the deployment.
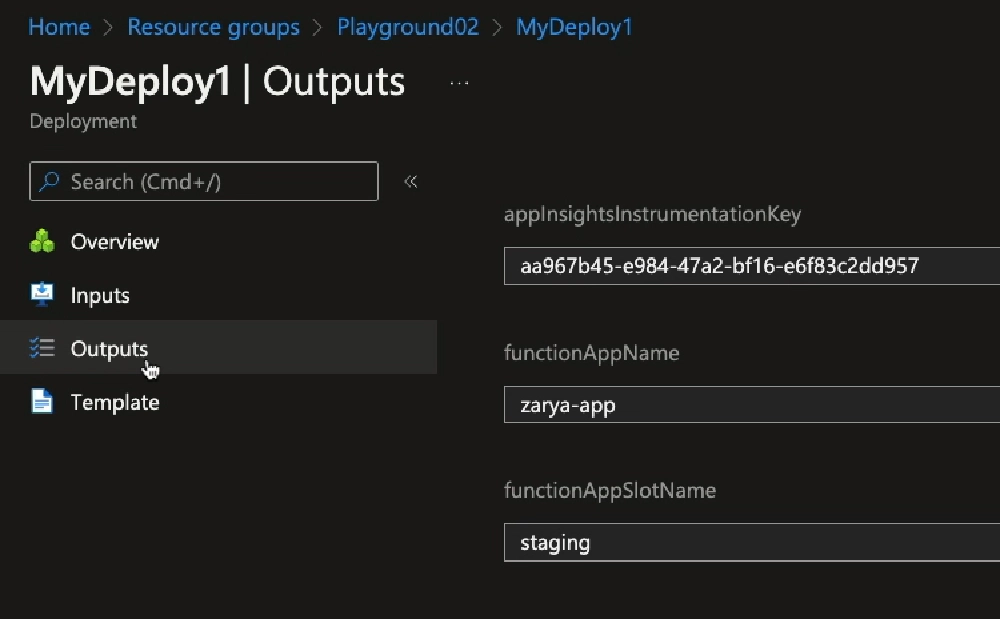
Azure Portal - deployment outputs
Notice how each module triggered its own deployment. So, the module we created for setting the app settings on the deployment slots shows as its own deployment when the main.bicep file calls it.
Conclusion
Bicep is pretty cool as now I have a file that defines a function app and all its dependencies. One thing I love about Infrastructure as Code (IaC) is that not only do I have a file that I can use to recreate and make changes to my app, but my changes can be versioned and documented with my project, and it acts as documentation for what my project needs!