Since the release of SharePoint 2013 & once Office 365 was refreshed, we’ve been able to create workflows in SharePoint Apps. However this has been limited to the workflows living exclusively within the AppWeb where the app was installed. If you wanted to have the workflow run in a regular SharePoint site, such as a Team Site, or a non-AppWeb site, you had to deploy your workflows using a sandboxed solution… and that just left you feeling all dirty.
Earlier this year Microsoft announced at the SharePoint Conference 2014 that you would be able to include your workflows in apps and have them installed in the HostWeb (ref: see session SPC3994 - What’s New in Workflow for SharePoint Online for the actual announcement). They call these Integrated Workflow Apps. Recently Microsoft let it be known that SharePoint Online now supports this capability. The only thing that stinks: the developer tools don’t so you have a bit of hackery you need to do to make it work. So how do it in your environment?
First, start with a regular old SharePoint App that contains a workflow… there are plenty of posts that show you how to do this so I won’t repeat it here. You also will need to give the SharePoint app Manage permissions on the Web within the AppManifest.xml file.
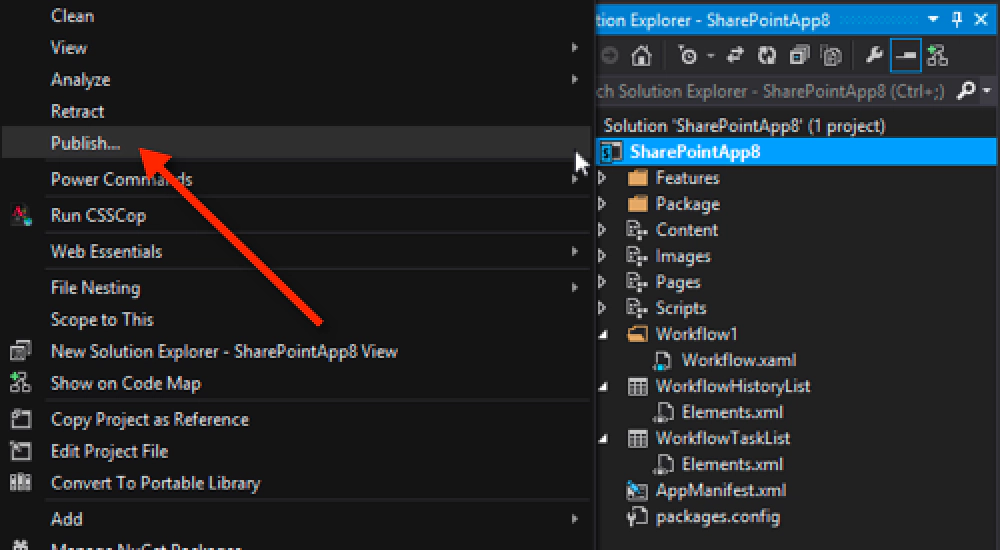
Next up, generate the app package (.app) to package everything up. Do this by right-clicking the project in Visual Studio & selecting Publish.

Integrating Workflow App
Windows Explorer will open with the location of the published app once Visual Studio has published it. Within this file you need to make a minor tweak to tell the deployment engine in SharePoint Online that this is an Integrated Workflow App. Because this is just a renamed ZIP file, I’d make a copy and change the extension to ZIP, then unpack it.
When you look at the contents of the package that you just unpacked, you’ll find a file WorkflowManifest.xml. Open that up in a text editor. Notice that to start, it’s an empty file. Add the following to it and save your changes:
Then drag it back into the .zip file of the app package, then rename the package to .app. You now have an Integrated Workflow App! Deploy this like any other app package to your Office 365 environment and poof, you can use it in your sites & lists! This works for both site & list based workflows today.
Remember, Integrated Workflow Apps only work in SharePoint Online in Office 365… the are not presently supported in the On-Premises SharePoint Server 2013 deployments.