In part 1 of this series I explained the reasoning and background on why I’m building a virtualization rig. In that post I included my experience with trying to get an OOTB Dell PowerEdge 2900 III. In this post I want to cover parts. The next part will be more about set up and installation of the virtualization software.
Before electing to build a new machine, I did consider getting a MacPro and installing VMWare Fusion on it. The reason I didn’t was because first, I could build a machine for much less than the MacPro cost and the Fusion just isn’t meant for constantly running VMs IMHO. I did love the fact it is completely silent… no fans to speak of… yet another sheer engineering beauty from Cupertino, CA.
Anyway, so I elected to build a new machine. In spec’ing out a machine, I was not only conscious of the points I mentioned in part 1 (fast, quiet & reliable), but I also wanted to have a shot at running VMWare ESX. This is a tricky proposition as unlike Microsoft’s HyperV where the drivers live in the VMs, in ESX, the hardware drivers reside in the hypervisor and thus, only certain devices are on the approved list. I did my best working off the VMWare forums & whitelist, but it wasn’t easy.
All links below go to the manufacturer product page… the price list on the end shows you where I got them (almost all from NewEgg).
First was the motherboard. I wanted something that had onboard RAID 10, supported at least 32GB RAM and two Xeon CPUs. I went with the ASUS DSEB-DG and I’m very pleased with it.
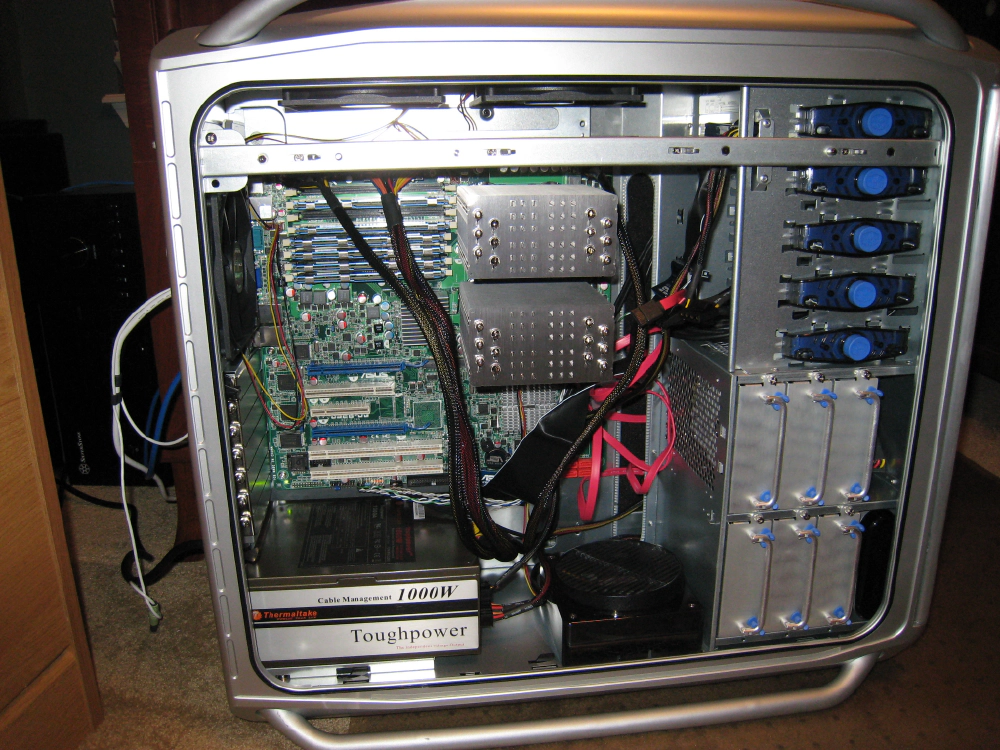
Then came the CPUs. I elected for two 64-bit Quad Core Intel Xeon’s E5410’s @ 2.33Ghz, 12MB cache & 1333FSB. To keep these guys cool, it was hard finding a heatsink that would allow me to have two side by side… and to keep with the quiet factor, I had to find something that really distributed the heat. I went with two Thermalright HR-01 X’s. More on the cooling in a bit…
Now I needed some RAM. The ASUS required FBDIMM’s which aren’t cheap. It has 8 slots so I elected to get six 4GB FBDIMM’s from Crucial (this was the most expensive part of the box) for a total of 24GB with room to jump up to 32GB as I left two slots open.
Next, storage! I got four 750GB 7200RPM SATA2 (3GB) WD Caviar Blue drives with 16MB caches. I’ll stripe a pair of them for two 1.5TB logical sets and then mirror them ala RAID10. Always hard cutting 3TB -> 1.5TB, but speed and fault tolerance is key for me!
The next thing I needed was a power supply. This turned out to be the biggest pain of all as I ended up going through three of them. I wasn’t looking at the connectors coming out of the PSU and thus, my ASUS motherboard wasn’t getting enough power. Then I finally found the Thermaltake 1000W with the 24pin, 8pin and 2x4pin motherboard/CPU power. It’s also got modular cables which are real nice for airflow.
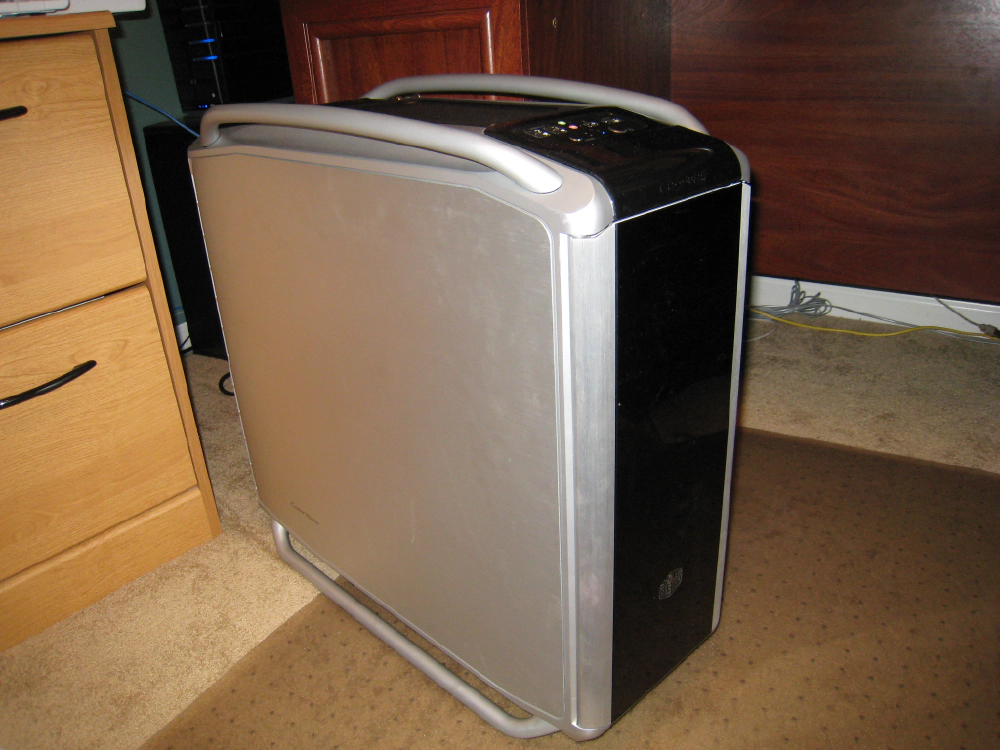
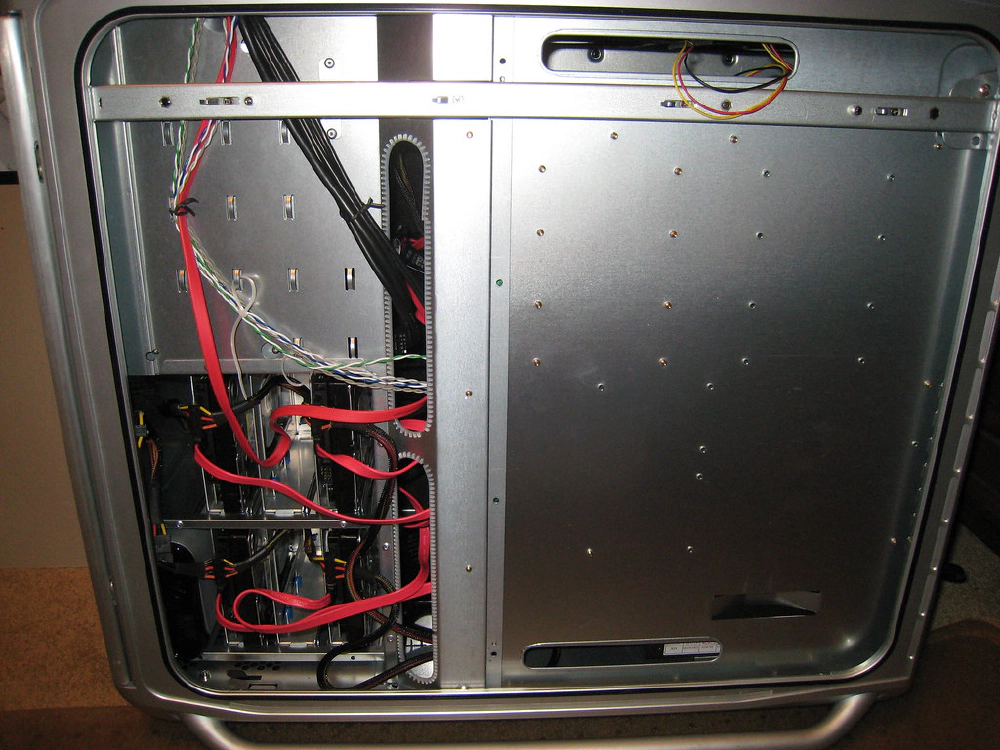
Last but not least… gotta have a place to put it all! I really wanted to reuse my Antec P182 case (the same one Hanselman used), but the ASUS was just too big. I elected to go with the Cooler Master Cosmos 1000 and I love it! Brilliantly built… love the drive caddy’s and the ability to hide cables around the back. It’s got four big 140mm fans that are virtually silent. Also the fans, except for the rear one, have washable filters to trap dust… very slick!
Oh, as for the DVD drive… I just used one I had lying around. All it’s used for is installing for a few installs.
And now for the buildout… and because people love pictures (click on pictures for bigger shots)…

Closed case

Here's the open insides
Check out those two heatsinks! Absolute monsters (hard to see in this pic from above, ), but they don’t get hot and keep the Xeon’s cool without fans! No cards though as you can see. The HDD’s are behind those six caddy’s. There are two fans at the top you can barely see, one in the back near the RAM ad one at the bottom with an angled top.

And finally, the other side of the case.
Putting everything together wasn’t that bad. The hardest part was getting the heatsinks secured to the motherboard as the brackets had some fancy way to go into the heatsink and then get bolted down. You have to use this tiny wrench and you just don’t have a lot of room to work. Everything else was a piece of cake (once I had the right PSU).
Recall, total budget was around $5,000. Here’s the parts & price list:
| Part | Price |
|---|---|
| ASUS DSEB-DG | $490 |
| 2x Intel Quad Core Xeon E5410 2.33Ghz | $270/ea ($540 total) |
| 2x Thermalright HR-01-X heatsinks | $55/ea ($110 total) |
| 3x 8GB kit FBDIMM DDR2-800 Crucial RAM (each kit = 2x4GB modules) | $835/kit ($2,505 total) |
| 4x WD Caviar 750GB 7200RPM SATA 3.0GB 16MB Cache | $130/ea ($520 total) |
| Cooler Master Cosmos 1000 | $190 |
| Thermaltake Toughpower W0132RU 1000W PSU | $330 |
Total: $4,685
What you don’t see here is the experiencing of ordering 3 different PSU’s (two of which that were returned) and ordering the wrong RAM the first time around. :) But notice that this is a solid $700 less than the Dell. Oh, did I mention how quiet it is? Next to my MacBook Pro (which has an aversion to using fans to cool itself apparently), it’s the quietest thing in my room. Seriously… it’s more quiet than the ceiling fan! I’m blown away by how quiet it is!