In Part 1 of this series on these little tools I created for SharePoint developers I gave a bit of an overview of what they are all about and where you can get additional information. Part 2 discussed CodeRush (CR) templates and showed how they are used. Part 3 showed some MOSS Publishing-specific templates in the collection. In this post I want to dig into some of the guts of how they work… specifically around the subject of StringProviders.
StringProviders, a CR thing, are like methods that return strings. That’s it… yes, they are that simple. I used them in quite a few places in the templates. The most commonly used one, SPNewGuid, is probably the easiest to explain. Before I go on, let me say yes, I am aware there is a NewGuid StringProvider added recently in the stock CR install. Unfortunately it doesn’t provide the customization for what we need in SharePoint CAML files, so I created my own.
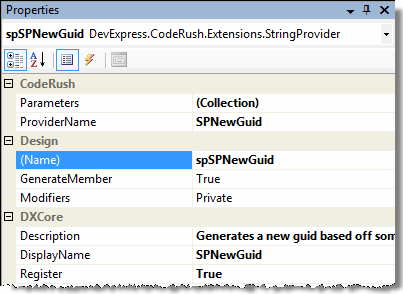
To create a StringProvider, create a new plugin project in Visual Studio (VS). Then, drag the StringProvider object from the Toolbox onto the design surface. Looking at it’s properties, there are a few things you can set:

Figure 1: spnewguid-1
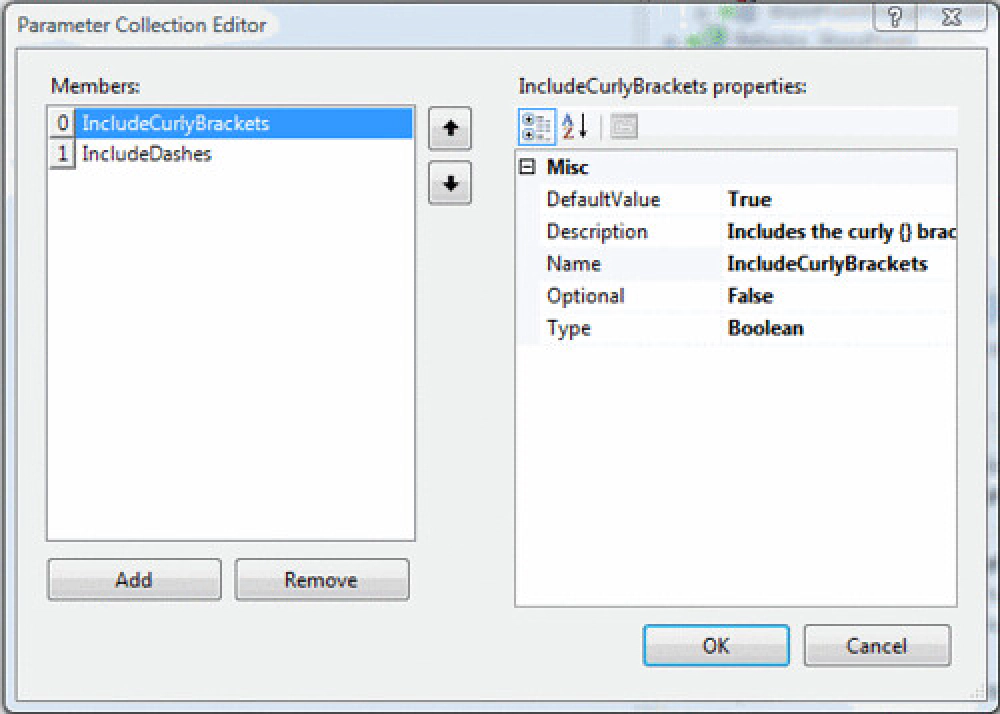
Take note of the ProviderName property. Now, look at the parameters by clicking on the builder … button. There are two parameters that allow you to specify if the GUID generated should have the curly brackets {} and / or the dashes. Why have these options? Well, we don’t use curly brackets anywhere in SharePoint CAML files except when referring to site column / field definitions and we don’t want curly brackets or dashes when creating new GUIDs for use within content type IDs:

Figure 2: spnewguid-2
If you switch to the Events view of the Property window, you’ll see an event named GetString. This is what is called when the StringProvider is invoked. The code in him is quite simple:

Figure 3: spnewguid-3
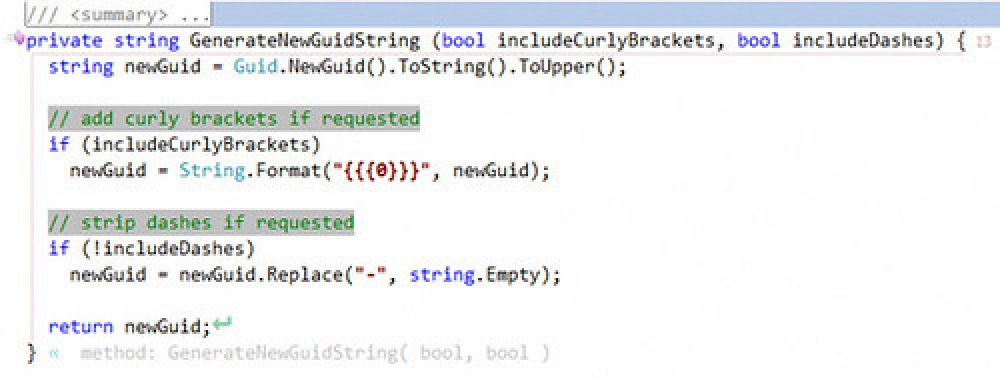
All he does is grab the parameters and call another method: GenerateNewGuidString(bool, bool):

Figure 4: spnewguid-4
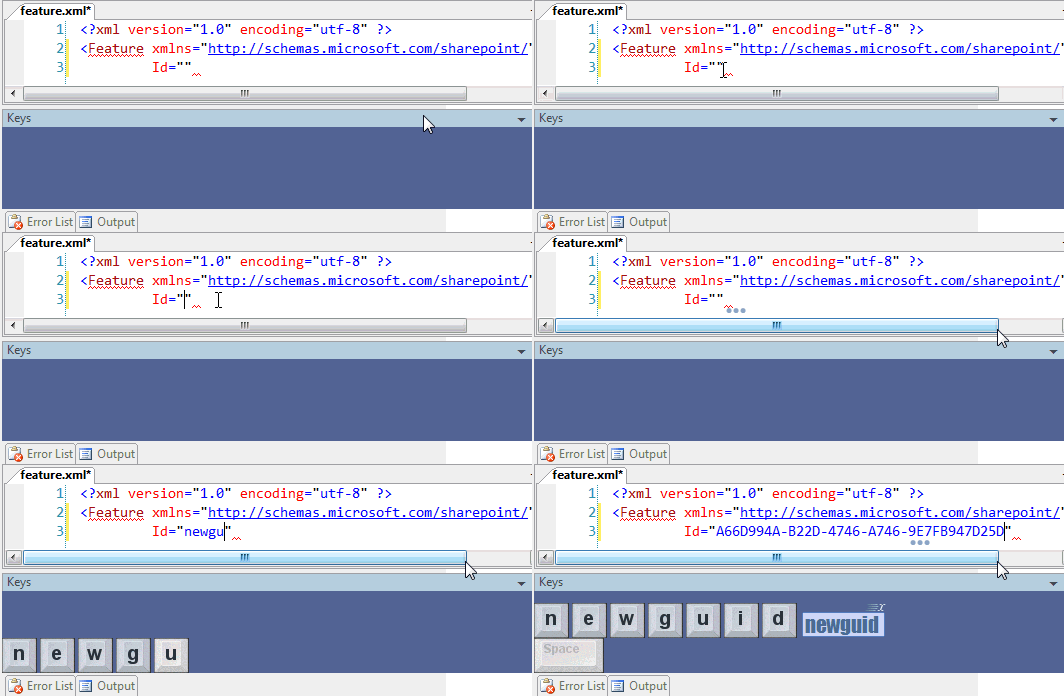
OK… once this is built and deployed, how do you use it? When creating a new template, right-click in the area where the code is going and select Insert StringProvider. This brings up a dialog where you can pick from the different StringProviders installed. For SPNewGuid, you can see it’s usage in the newguid template: «?SPNewGuid(false,true)». This is calling the provider saying “no curly brackets, but include dashes”. Now, you can type newguid
SPACE
within any XML file and get a new GUID right away:

Figure 5: newguid
The SPNewGuid StringProvider is in the plugin CR_SPUtilities.dll that is included in the download. There are two other StringProviders in that plugin:
- WorkflowClassName: Looks for the first type in the current active project open in Visual Studio that implements either System.Workflow.Activities.StateMachineWorkflowActivity or Microsoft.SharePoint.WorkflowActions.SharePointSequentialWorkflowActivity and returns the name of the type (depending on the parameters, it will return the full name
[namespace].[typename], or just the type name). - EventReceiverClassName: Looks for the first type in the current active project open in Visual Studio that implements either Microsoft.SharePoint.SPItemEventReceiver or Microsoft.SharePoint.SPListEventReceiver and returns the name of the type (depending on the parameters, it will return the full name
[namespace].[typename], or just the type name).
There are also a few StringProviders in the CR_ProjectUtilities.dll plugin that may be useful outside of a SharePoint environment:
- ProjectNamespace: Gets the default namespace configured for the project.
- ProjectAssemblyName: Gets the default assembly name configured for the project.
- ProjectAssemblyFourPartName: If the project has been built, retrieves the strong name (4-part name) of the assembly via reflection. If it isn’t built, it builds the 4-part name, but adds a token for the PublicKeyToken part to be updated later.
To get more information on the tools including documentation, links to detailed screencasts / demonstrations, and a history, check out the main page:
Let me know what you think! Oh… and I didn’t name this post “part 1 of 5” for some random reason. Over the next four days, I’ll add another post related to these productivity enhancements. :)