I recently replaced my traditional home security system with a more modern set up. The old system was your typical box with multiple wired sensors hooked up to doors, windows, motion detectors & smoke/carbon monoxide detectors. The new set up takes all these existing sensors and exposes them as things in SmartThings where you can use the SmartThings Smart Home Monitor (SHM). This results in improved visibility, control and customization abilities of your home monitoring solution. You can learn more about this in my blog post DIY Home Security System with Konnected.io & SmartThings.
To interact with the old security system, you typically use bulky keypads with the back-lit LCD screen. These won’t work for the new set up… I wanted something much more modern. The solution: smart touchscreens!
ActionTiles for the Panel Controller Interface
This is where ActionTiles comes in. ActionTiles can talk to SmartThings and create an interactive browser-based experience into your SmartThings set up. This is what the master panel looks like for my house (some tiles are blurred out for privacy reasons):
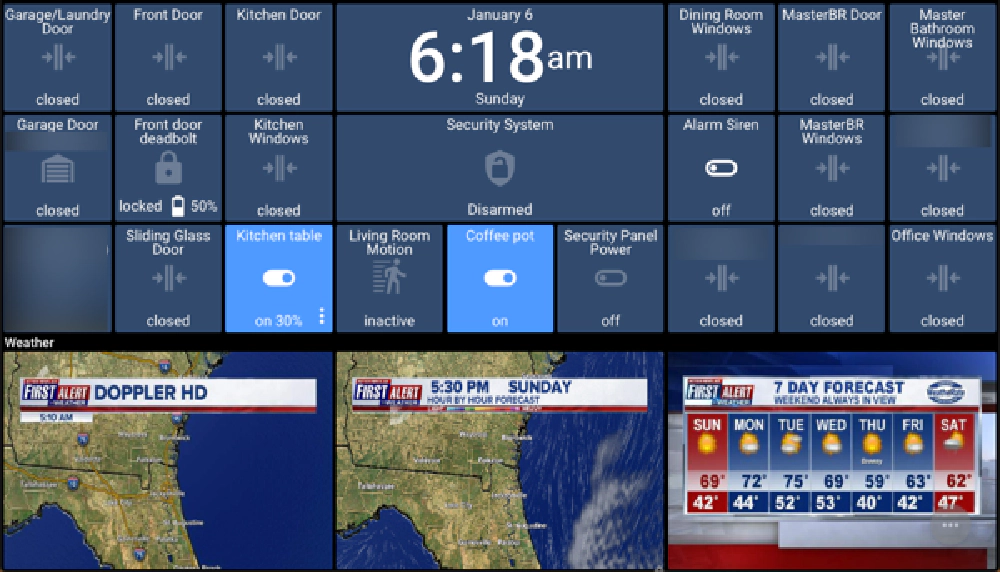
Smart Home Monitor with Action Tiles
This panel is actually much bigger… I can stroll down to control our smart thermostats, view the cameras we have on our house and a lot more. Some of the tiles are interactive while others aren’t. For instance, the sensors from the old security system aren’t interactive such as doors, windows & motion detectors.
ActionTiles rocks as I can configure panels as much as I like in a browser experience from my desk and wherever they are being consumed, they automatically get updated.
Now, how to show these ActionTiles panels where the keypads were, without breaking the bank… the solution: cheap tablets!
Amazon Kindle Fire Tablets as Kiosks
Amazon Kindle Fire tablets make for a great inexpensive kiosk for your home. I’ve since replaced my two existing keypads with Kindle Fire HD 8" tablets that look great on the wall:
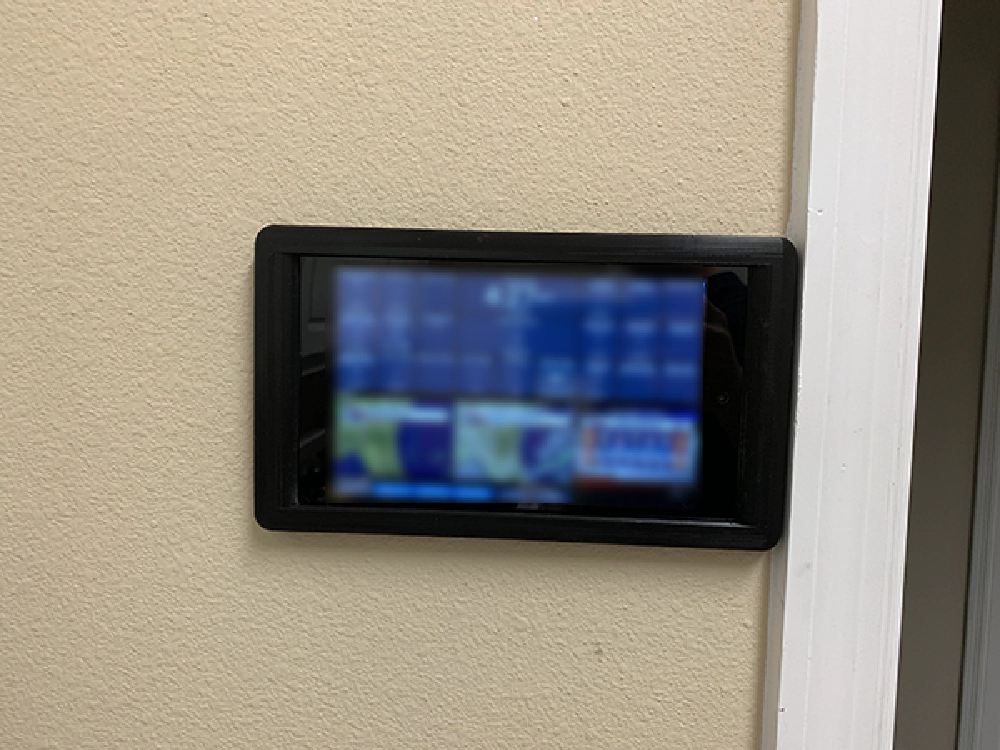
Kindle Fire tablet wall mount
We like it so much, we’re considering getting the larger 10" Kindle Fire for the kitchen. That one’s ActionTiles panel will use a larger tile theme to see it from across the room. It’s also great for displaying recipes via the Plan to Eat app we use for meal planning.
The one in the picture above is in a 3D printed mount, but these are pricey ($30) and can be mounted on the wall with plenty of permanent and temporary mounting options.
To use the Kindle as a kiosk, I had to solve a few things:
- powering the device
- displaying the ActionTiles panel
- kiosk mode
The bulk of this post is about the second two items in this list, but first, let me address powering the Kindle.
Powering the Tablets
The existing security system had a wire that ran to the main security system. This wire provided 12V power & data to the keypad. Because the Kindle tablets are using my existing wireless network to show the ActionTiles panel, I only needed to supply power, but just 5V of power.
In my other post, DIY Home Security System with Konnected.io & SmartThings, I explained how I hooked up the wires from the panels to receive power… go check that post for details.
To step down the power from 12V to 5V, I picked up a converter with a right-angle microUSB connector for each tablet that’s mounted behind the tablet in the wall. You can find tons of options available… I got mine from Konnected.io.
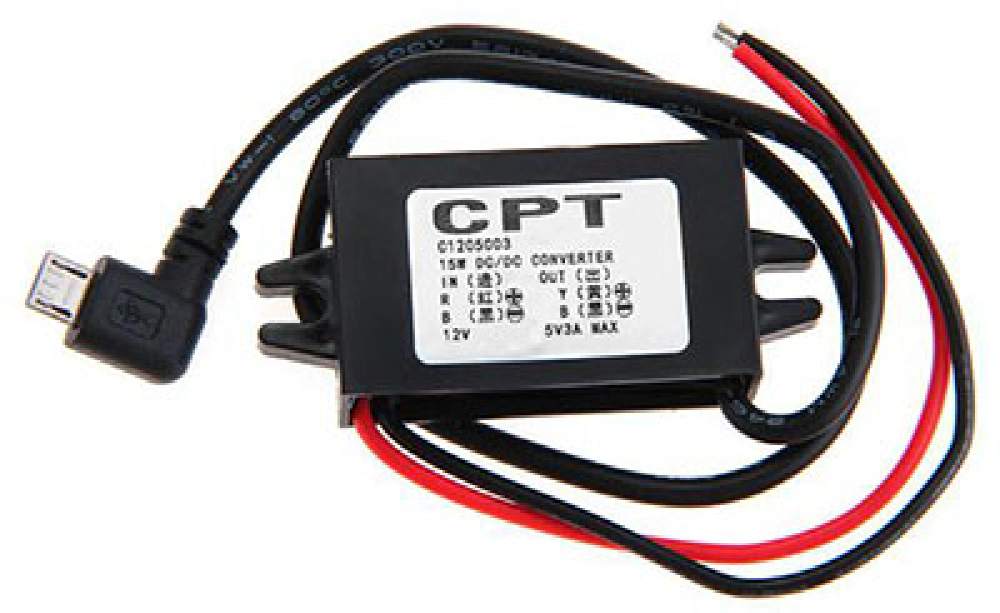
12V to 5V converter
One thing I want to call out though was that I added a SmartThings plug that cycles power on/off every few hours to the tablets. Driving constant power for an extended period of time to a tablet isn’t safe as the batteries aren’t designed for that. This way, the tablets charge for 3 hours, then run off battery discharging themselves for 3 hours which is more what they were designed to do.
This is controlled using the free SmartThings SmartApp webCoRE which is like an automation engine. Here’s what my webCoRE piston (what routines are called in webCoRE) looks like.
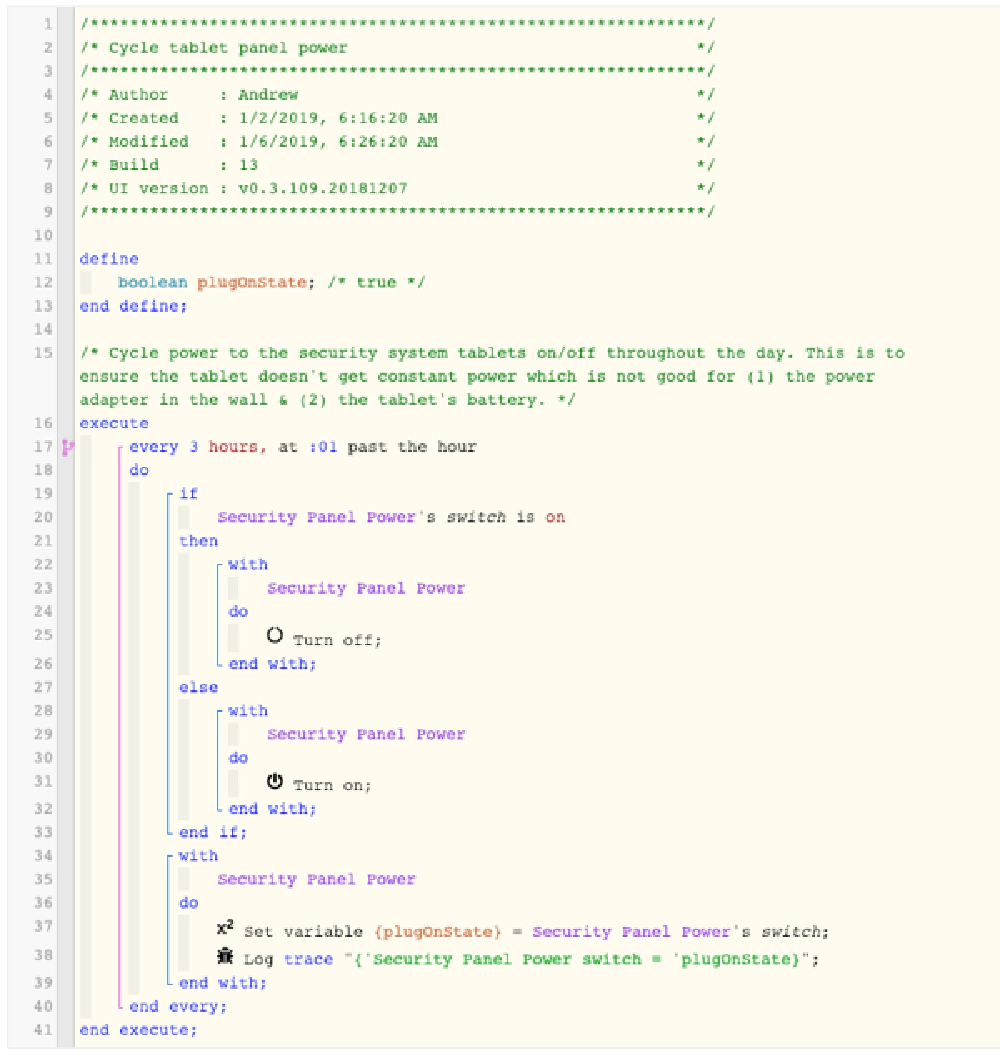
webCoRE workflow to power cycle tablets
With the power issue addressed, let me turn to get the Kindle Fire set up:
Configuring Kindle Fire HD as a Kiosk
I picked up two brand new Kindle Fire HD 8" tablets at the lowest price. This means while they were just $50 each, they would be subject to ads and special offers… something I didn’t want on my kiosk. The way around this: don’t register your Kindle with Amazon. That means you can’t use the Kindle store or Amazon services (such as Alexa), but for me that’s fine… I just wanted an inexpensive tablet with a browser. With just a few tweaks you can turn a Kindle Fire HD into a regular Android tablet.
Don’t worry about messing your tablet up. You can always reset your Kindle back to the factory settings and set it up the same way it was when you first unboxed it.
There are a few steps you need to perform to do this. Someone has created a script to do a lot of this for you, but I had issues with it for a few reasons, primary because the script isn’t designed to work with generation 7 Kindle’s where at the time of writing this, the latest ones are generation 8. In the latest update, Amazon changed the Kindle Fire OS so you can’t do some things, like uninstall OOTB apps.
The following manual process only takes about 15 minutes for each tablet:
- Reset Kindle to factory default settings
- Connect to WiFi without registering the device with Amazon
- Install the Google Play Store (which will replace the Kindle store) & Prerequisites
- Install a Custom Launcher, Kiosk Browser & Home Button Hijacker
- Configure the kiosk browser
Let’s get started. I’ve followed this process on two gen 8 Kindle Fire HD 8", and two older Kindle Fires (gen 3 & gen 6) I wasn’t using… old devices in our household. The steps are almost identical, you just have to pay attention to devices.
Reset Kindle Fire to Factory Default Settings
The goal is to get back to the initial screen when you first unbox your Kindle. Your goal is to get to the settings screen when prompted for your default language. More recent Kindles look like this:
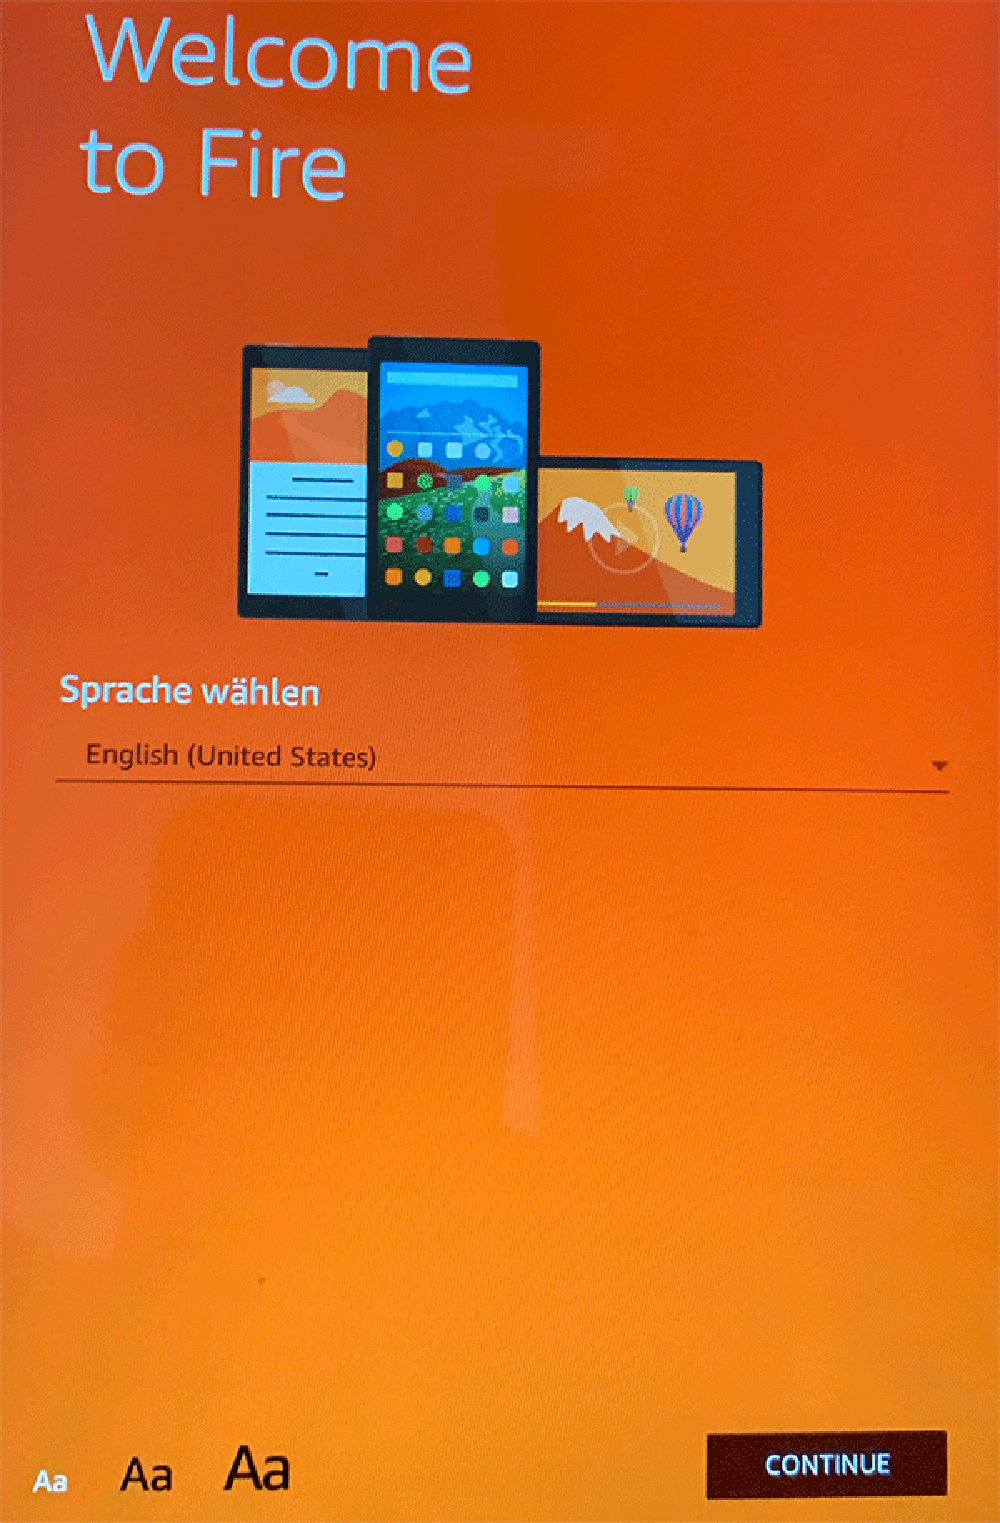
Kindle: Reset to factory defaults
If you aren’t here, reset the device to factory settings which will erase everything: Settings - Device options - Reset to Factory Settings.
Connect to WiFi without Registering the Kindle with Amazon
After selecting your default language, the first step is to connect to WiFi. But don’t do it the guided way… this will register your device with Amazon.
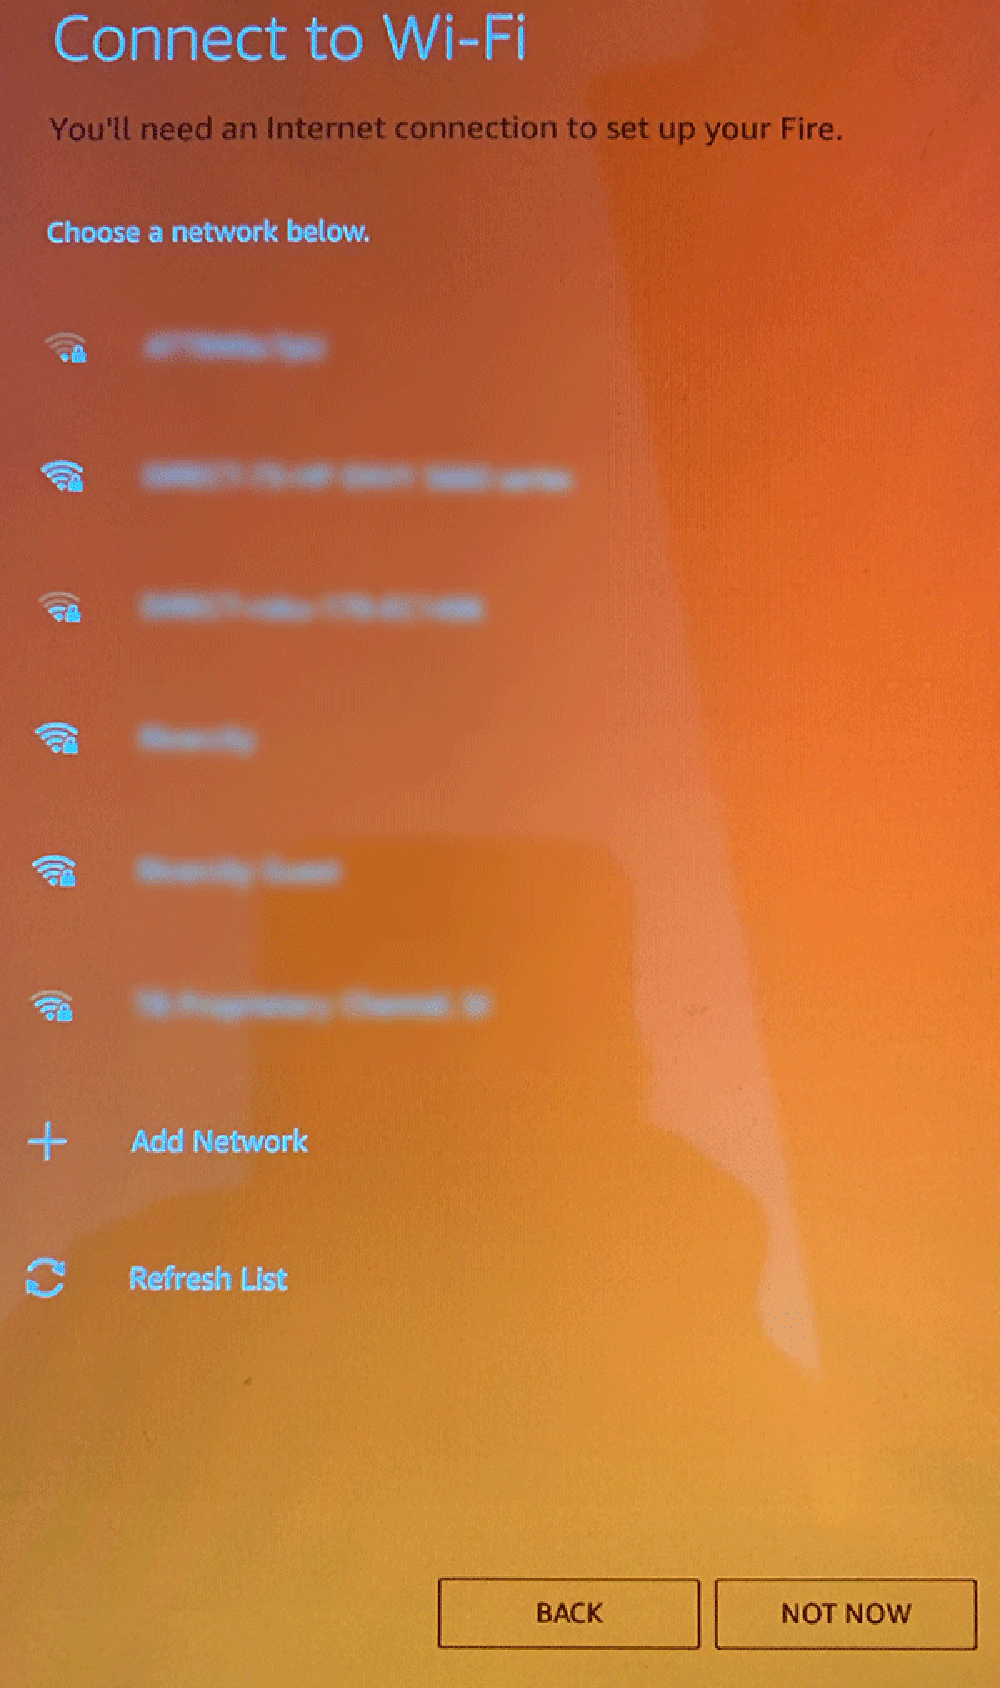
Kindle: connect to WiFi
To get passed this step, select any WiFi network, start typing in a password until you get the Cancel button at the bottom. Select that followed by Skip to skip connecting to WiFi in the guided set up.
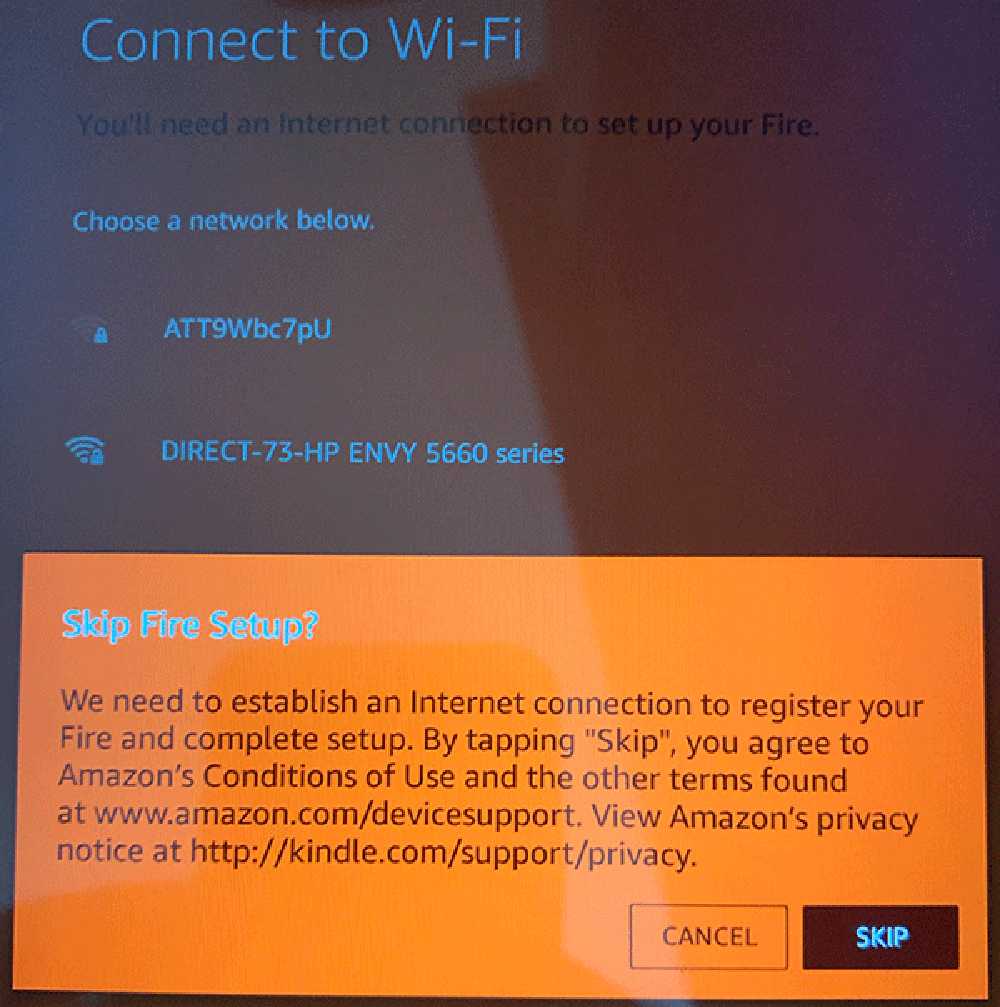
Kindle: Skip Fire set up
When the home screen loads, you now have a working but unregistered Kindle that won’t show ads! The downside: you can’t use any Amazon services including the Kindle store. I’ll fix that in a moment.
First, connect to WiFi… doing it manually will not register your Kindle.
Swipe down from the top of the screen and select the gear for the Settings menu:
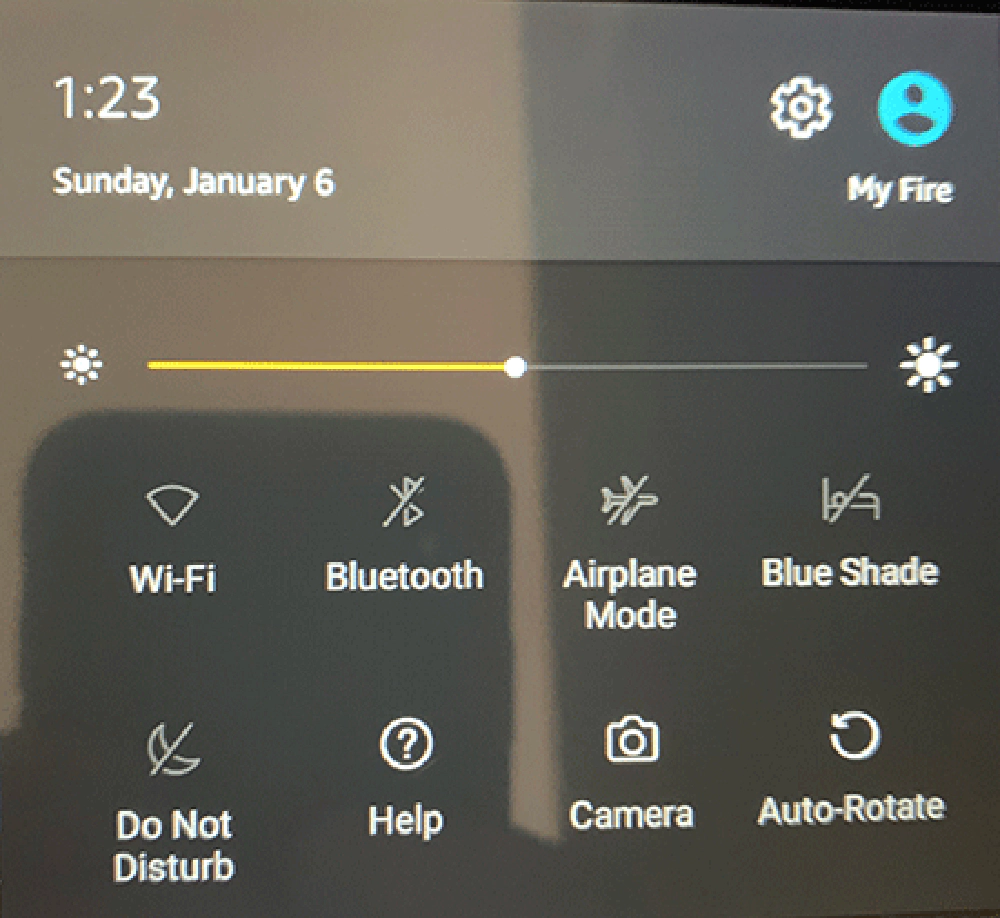
Kindle: Settings
Select the wireless / WiFi menu option, select & connect to a network.
Install the Google Play Store (which will replace the Kindle store) & Prerequisites
The next step is to get the Kindle set up like a regular Android tablet. To do this you’ll need to install a few things in a specific order.
Open the Silk Browser and head to https://www.apkmirror.com. Find the following items and download the correct file for your Kindle’s version:
- Google Services Framework (filename: com.google.android.gsf_)
- Google Account Manager (filename: com.google.android.gsf.login_)
- Google Play Services (filename: com.google.android.gms_)
- Google Play Store (filename: com.android.vendring_)
Be sure to download the correct version for your Kindle. If you download everything from the Kindle’s Silk Browser, the APK Mirror site does a pretty good job of filtering out what doesn’t apply to your device but you still need to doublecheck.
The Kindle runs Fire OS which is based on a variant of Android. Each of these installs has a minimum supported version. Depending on your Kindle, make sure you get the correct version or they won’t install. Check the Fire HD Wikipedia entry for a list of the different Kindle Fire HD’s and the corresponding Fire OS version on the device. Then use the Fire OS Wikipedia entry to determine the version of Android that version of Fire OS is based on. Here’s a quick reference:
- Kindle Fire HD gen 2 & 2.5: Android 4.0.3
- Kindle Fire HD gen 3: Fire OS 4 & Android 4.1
- Kindle Fire HD gen 4 - 7: Fire OS 5 & Android 5.1.1
- Kindle Fire HD gen 8: Fire OS 6 & Android 7.1
For architecture, you want either the noarch, universal or armeabi-? option.
After downloading these four files, install each one. From the Kindle home screen, select Docs - Local Storage - Download. Install each of the files you downloaded. I’ve included the filenames in italics in the list above to help to install the correct one.
When installing the first one, you will be blocked due to the settings on your device. Select Settings - Advanced and enable the option Apps from Unknown Sources. Then go back through the installs in order.

Kindle: Installation blocked
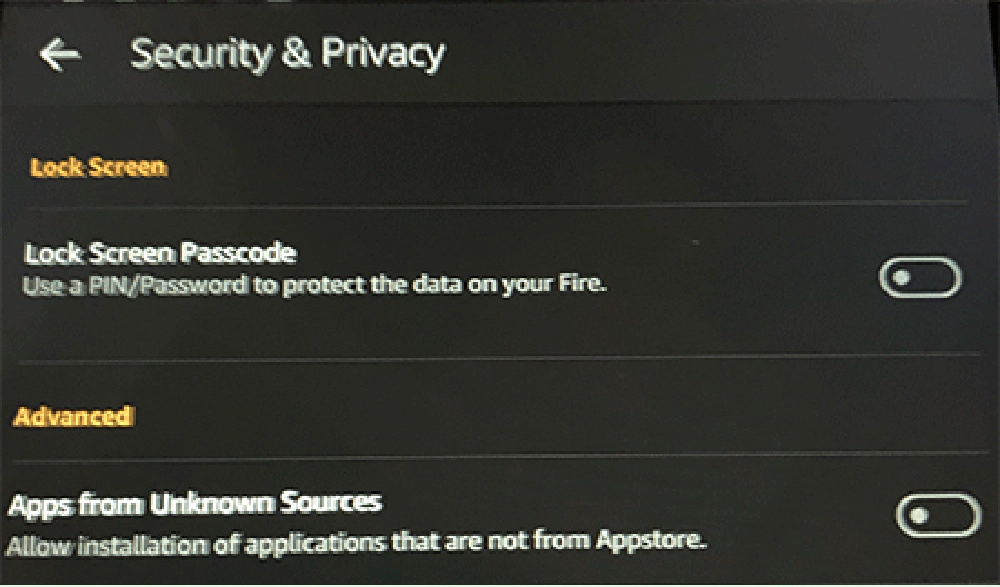
Kindle: enable Apps from Unknown Sources
Go back to the Kindle home screen. You will now see the Google Play Store app. Launch it and go through the initial sign in process using your Google Account.
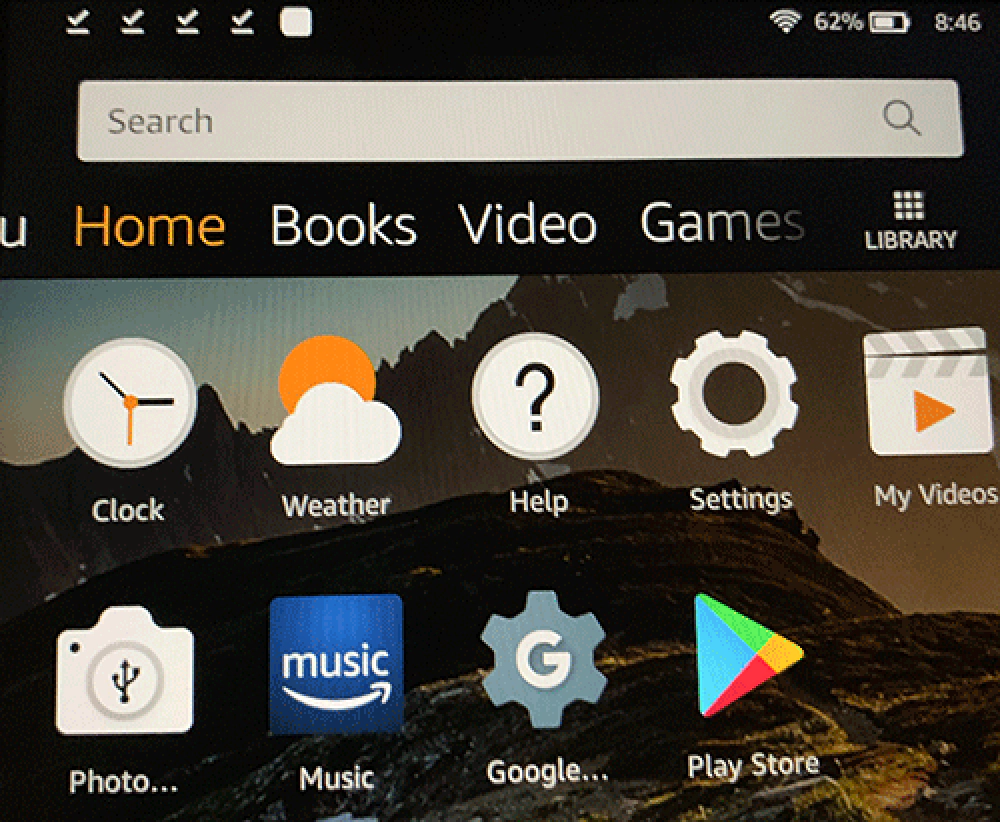
Kindle: Installed Google Play
Install a Custom Launcher, Kiosk Browser & Home Button Hijacker
Once you get into the Google Play Store, find and install the following two apps:
- Nova Launcher: This is used to change the default launcher experience on the Kindle from the stock Amazon one. I use this to hide all the default apps installed on the Kindle Fire OS.
- Fully Kiosk Browser & App Lockdown: This is used to implement the kiosk browser. It’s free, but if you pay for a license you can have extra features like controlling the screen brightness, automatically waking the kiosk when the camera detects motion and other cool features. The free version is all you really need.
There’s one last app to install: LauncherHijack. This will take control over the Android “circle” home button on the screen to launch the Nova Launcher. Go back to the Silk Browser, navigate to https://github.com/BaronKiko/LauncherHijack/releases, download the latest APK file and install it.
Then, configure the home button hijacker:
- Swipe down on the screen and select the gear for Settings
- Select Accessibility - Services
- Turn on To detect home button press and when prompted, select the Nova Launcher
Next, configure the Nova Launcher:
- Swipe down on the screen and select the gear for Settings
- Select Accessibility - Services
- Turn on Nova Launcher
Press the Home (circle) button. Notice all the default apps are gone as you are now using the Nova launcher.
Configure Fully Kiosk Browser:
- From the new launcher, find and select Fully Kiosk Browser.
- Enter the Start URL to be your ActionTiles panel you created.
Once you’re logged into ActionTiles, you can configure the Fully Kiosk browser to your preferences. At a minimum, I like to swipe in from the left to open the browser’s menu and select Add to Home Screen to add a shortcut to my home screen for my ActionTiles panel. This makes it easier to start the kiosk mode if the tablet has to restart.