Leading up to the SPTechCon conference in Boston, MA, I wrote how I planned to forgo PowerPoint in my presentations and instead, rely completely on Github: Using GitHub for Developer & Technical Presentations. My plan was to simply show the presentation markdown file, but things took a turn in the right direction.
Before SPTechCon I gave a session at a local event, Code Impact. That morning I ran into a friend, Tom Bates who asked what my plans were and if I was using something called reveal.js. I wasn’t, but long story short, about 45 minutes before my session we implemented it. I took these changes to my other sessions for SPTechCon and updated them.
I’m sold and plan to use this model going forward. As the presenter, I really liked presenting this way! Multiple attendees came up and said they loved it… many were following along on their devices (tablets / laptops) during the session. I loved how quickly I could put a session together. It’s cool how attendees can get updates so quickly. During one presentation one attendee asked me to post some of my demo notes, so I added it to the repo & they noticed it right away because they were watching it. Way cool!
So, what did it look like? Let’s take an example from one of my sessions last week: BreezeJS Makes Client-Side SharePoint 2013 REST Development a… BREEZE!)
Step 1: Create the Repository & Build the Session
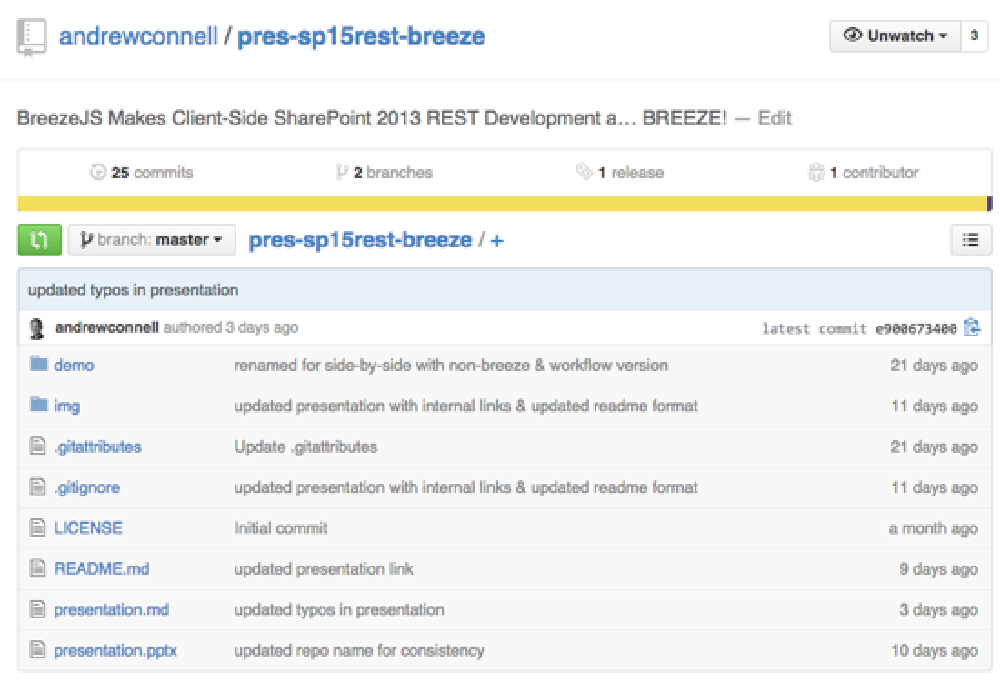
First I created a repository in GitHub. Within the default master branch, I added a few things, such as:

GitHub Repo
- demo: This contains the demo in the session… here we’d have multiple demo folders if necessary.
- img: This folder contains images used in the presentation.
- README.md: This contains the homepage for the repo. Here I put things like the session title, abstract, objectives, meta info like the session level & audience as well as some bio information. Finally there are two links here: one too my blog post on why I Use GitHub for Developer & Technical Presentations and another to the slides view. More on that in a moment.
- presentation.pptx: Sometimes conferences require you give them your slides ahead of time. This is just to appease them… for me, it contains the title, some bio & a link to the repo… no content.
- presentation.md: This is the actual presentation. It’s authored entirely in markdown. A few things worth noting: Every heading is separated by three newlines. You’ll see why this important in a moment. One thing to focus on here: only include the content of the presentation… nothing else. No Q/A slides, no BIO slides… nothing like this, just the pure content as you can see here: github.com / andrewconnell / pres-sp15rest-breeze / blob / master / presentation.md.
So that’s the easy & straightforward part. Attendees can download, clone or fork the presentation repo and consume it great, but this presentation doesn’t look so great when delivering the presentation. How to make it look better?
Step 2: Adding “Slides”
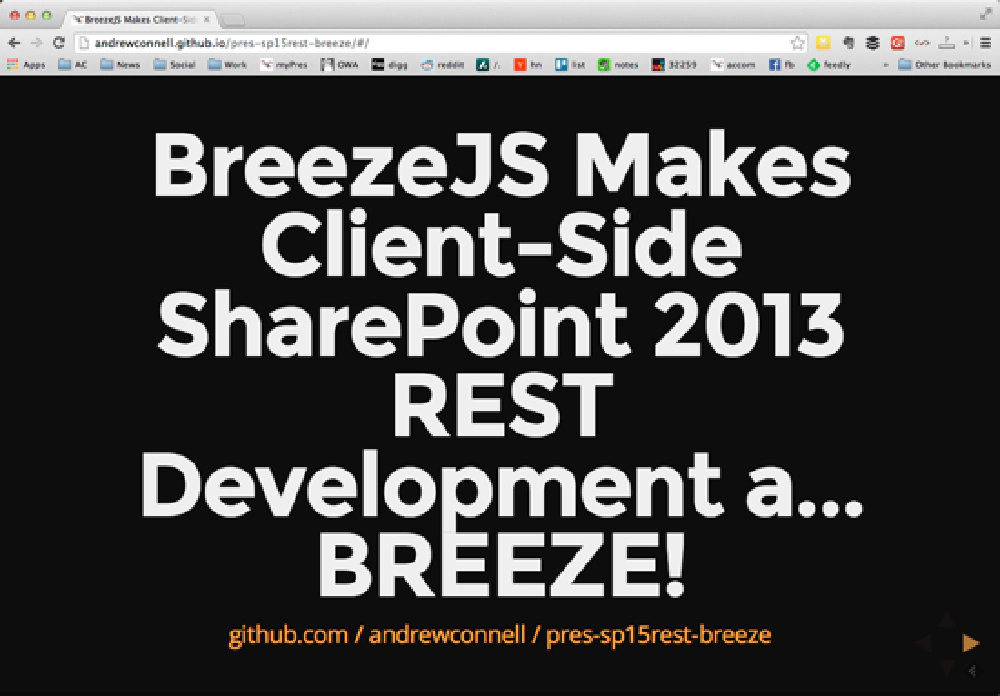
I put that in quotes because they aren’t really slides, but they look like it. With very little work, you can create a slide implementation of your presentation. Check it out, here’s the slide rendering of the same presentation. Use the arrow keys to navigate around (notice the arrows in the bottom-right corner. Now hit ESCAPE. Notice how slides primarily go left-to-right, but in the bio / intro section I also go vertical for my “about me”“section.

Preview Rendering of Slides
One cool aspect of this is that it all runs straight from the browser and is implemented in HTML5, CSS3 and JavaScript. This means all I really need to present is a modern browser and internet connection. I could even present from my tablet or phone (although I found it was hard to navigate the slides on my phone). What if you aren’t connected? There is a offline story too… you can fire up a local web server using Node.js with a single command line to serve the slides up locally.
Neat huh? Looks tough, but it’s incredibly easy. This is all done by reveal.js which you can get from it’s GitHub repo… on the repo’s readme you’ll find detailed install and config options.
GitHub provides a simplistic website for each user account with subfolders for each repository. The URL looks like this: http://[username].github.io/[reponame]. So how do you get files into that website? You create a specially named branch in your repo of gh-pages. GitHub will then render the contents of that branch for your website. You can see what the folder structure looks like for this same session here: github.com / andrewconnell / pres-sp15rest-breeze / tree / gh-pages. Notice how there are a lot more files in there. That’s because I added reveal.js to it.
Once you’ve added reveal.js, you need to tweak the index.html file reveal.js includes. The reveal.js documentation is very good so I won’t repeat it here, but you essentially use HTML5
elements for each slide or slide section. I created a single slide in the index.html for the session title, a new section for the bio stuff, each one pointing to an existing markdown file so I can reuse them across presentations, then a reference to this session’s presentation.md file and finally another slide for the typical summary / questions slide. You can see how mine looks for this session here: github.com / andrewconnell / pres-sp15rest-breeze / blob / gh-pages / index.html.
Once you push your changes, GitHub shows your slides!
Extra Nuts & Bolts
So that last section is a bit of an overview. Real implementation for me is a bit more complex… because I’m a developer and we like to add complexity, right? Just kidding… I added a bit more source control on my side to make this process a bit more repeatable.
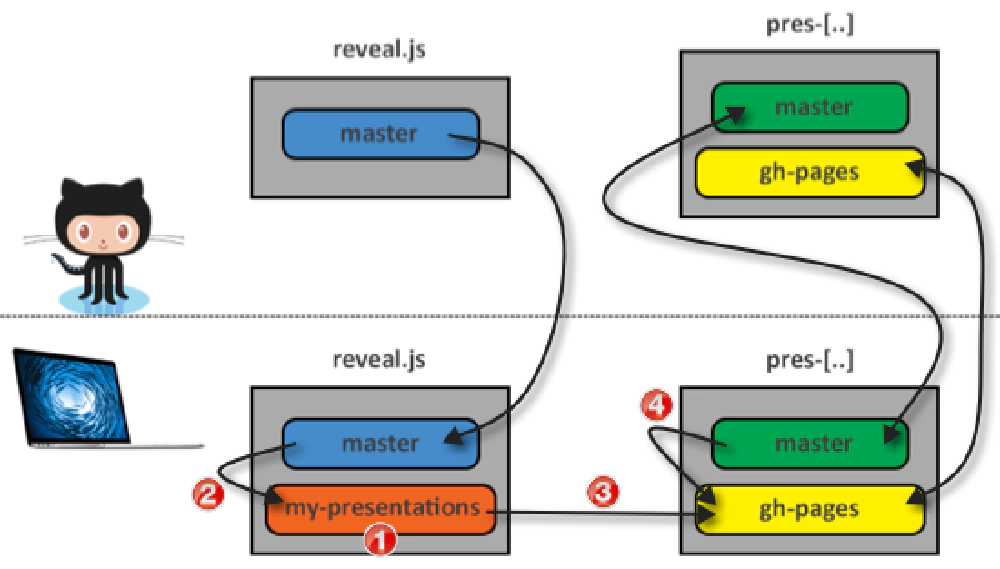
I cloned the reveal.js repo to my local machine. I then created a branch in my local reveal.js clone named my-presentation (see #1 in the figure below). Here I added my specific presentation files like the bio markdown files, any common images and the index.html file I use for my presentations. With this set up, if there are changes to reveal.js, I can fetch updates from reveal.js/master and merge those into my local reveal.js/my-presentation branch (see #2 below).
At this point I have a good starting point for any new slides.
After creating a repo for a presentation, like the one I keep referencing above, within the local repo cloned instance, I create a remote that points to my local reveal.js repo:

Console
All I really care about is the reveal.js/my-presentations branch at this point. I switch over to my pres-[..]/gh-pages branch and merge the contents of revealjs/my-presentations into it (see #3 in the figure below).
At this point I have my presentation and at minimum, I just need to tweak the index.html file for the session title and URL to the public GitHub repo for this presentation! Maybe there are other updates, but you get the drift.
In the future, if I update the presentation or demo files, I can just merge the pres-[..]/master into the pres-[..]/gh-pages (see #4 below) branch to refresh the slides.

Branching relationships between remote & origin repos
This last bit I ran through might sound a bit complicated but it really isn’t. And while it isn’t necessary, it ensures that each time I create a new presentation, I can throw it together and make it public in GitHub very quickly. All this might sound complex, but the left side (the reveal.js repo) was a one-time set up. It takes me literally about 2 minutes to set up the right side when I build a session.